Magic Yarn Balls
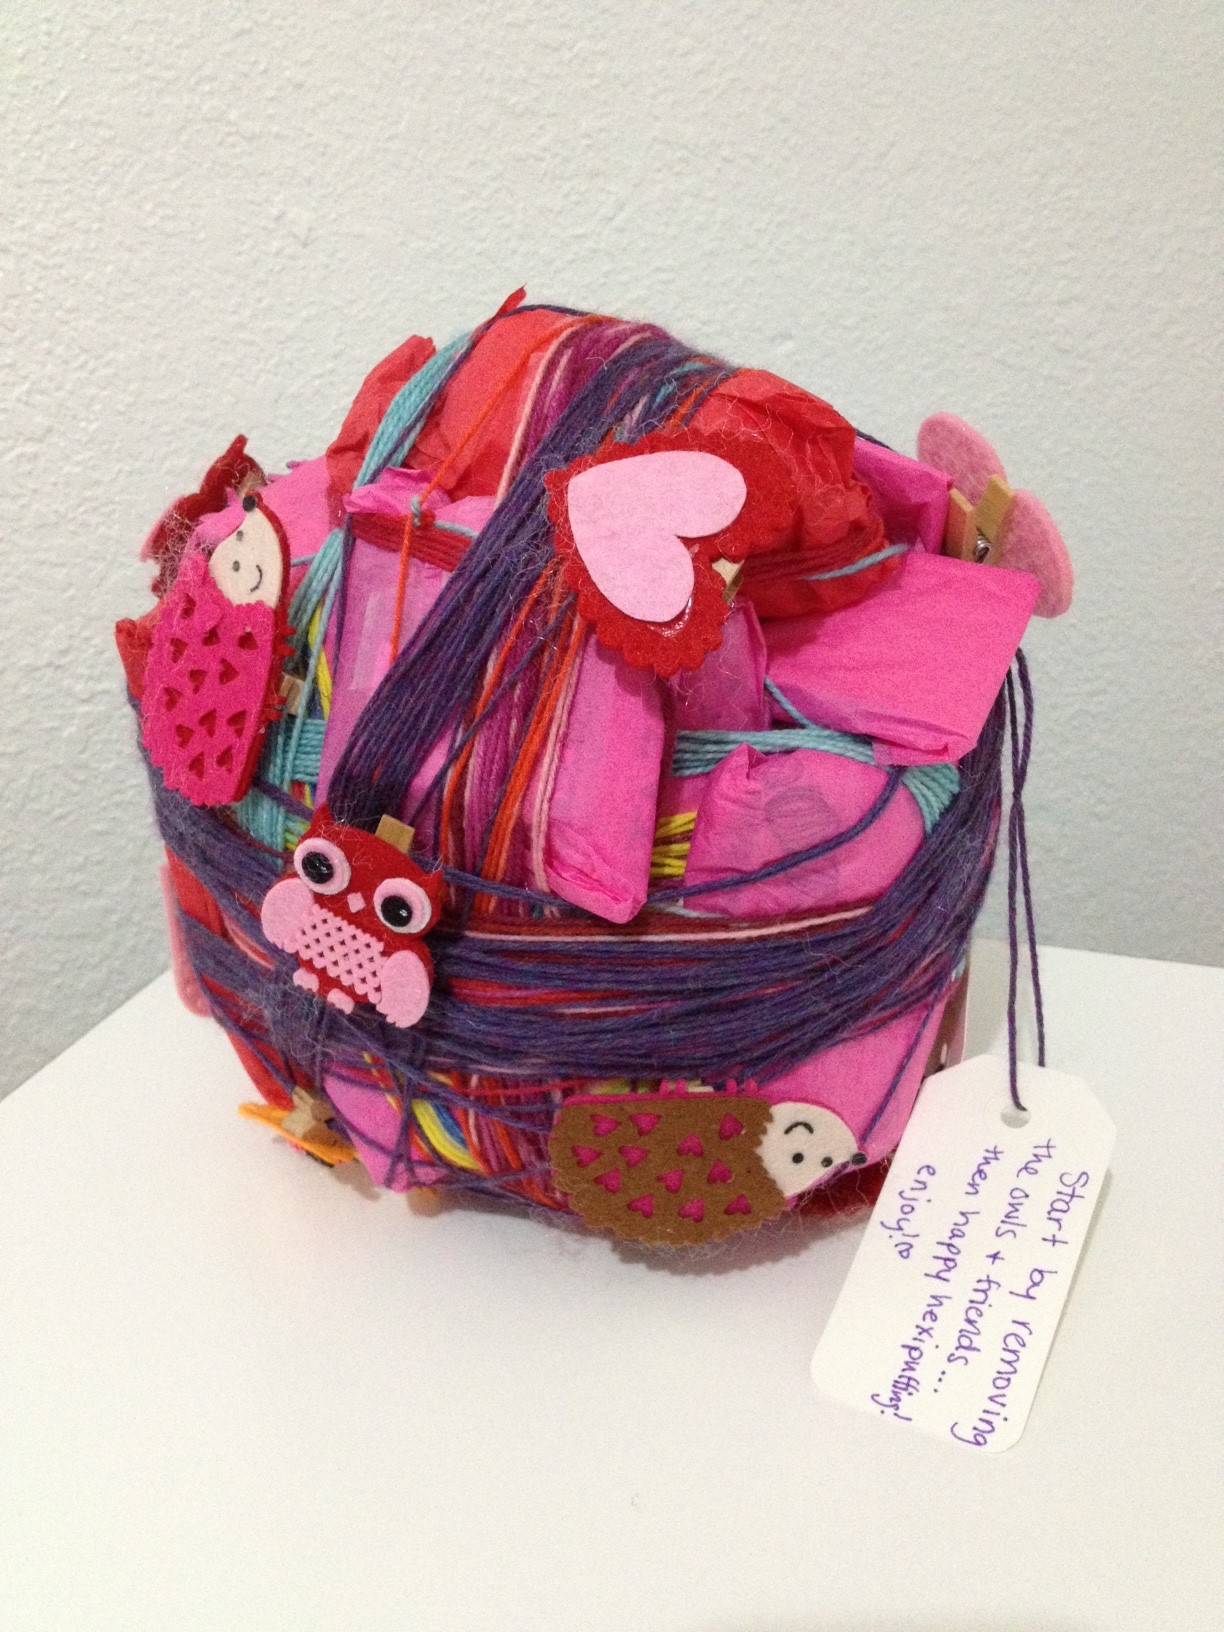
Today I’m making magic yarn balls. Magic yarn balls are skeins of yarn with little gifts wrapped inside. As you knit the yarn, treasures reveal themselves within. They make wonderful gifts for knitters and crocheters but you don’t have to be a fiber artist to make one! Here’s some examples of what they look like:

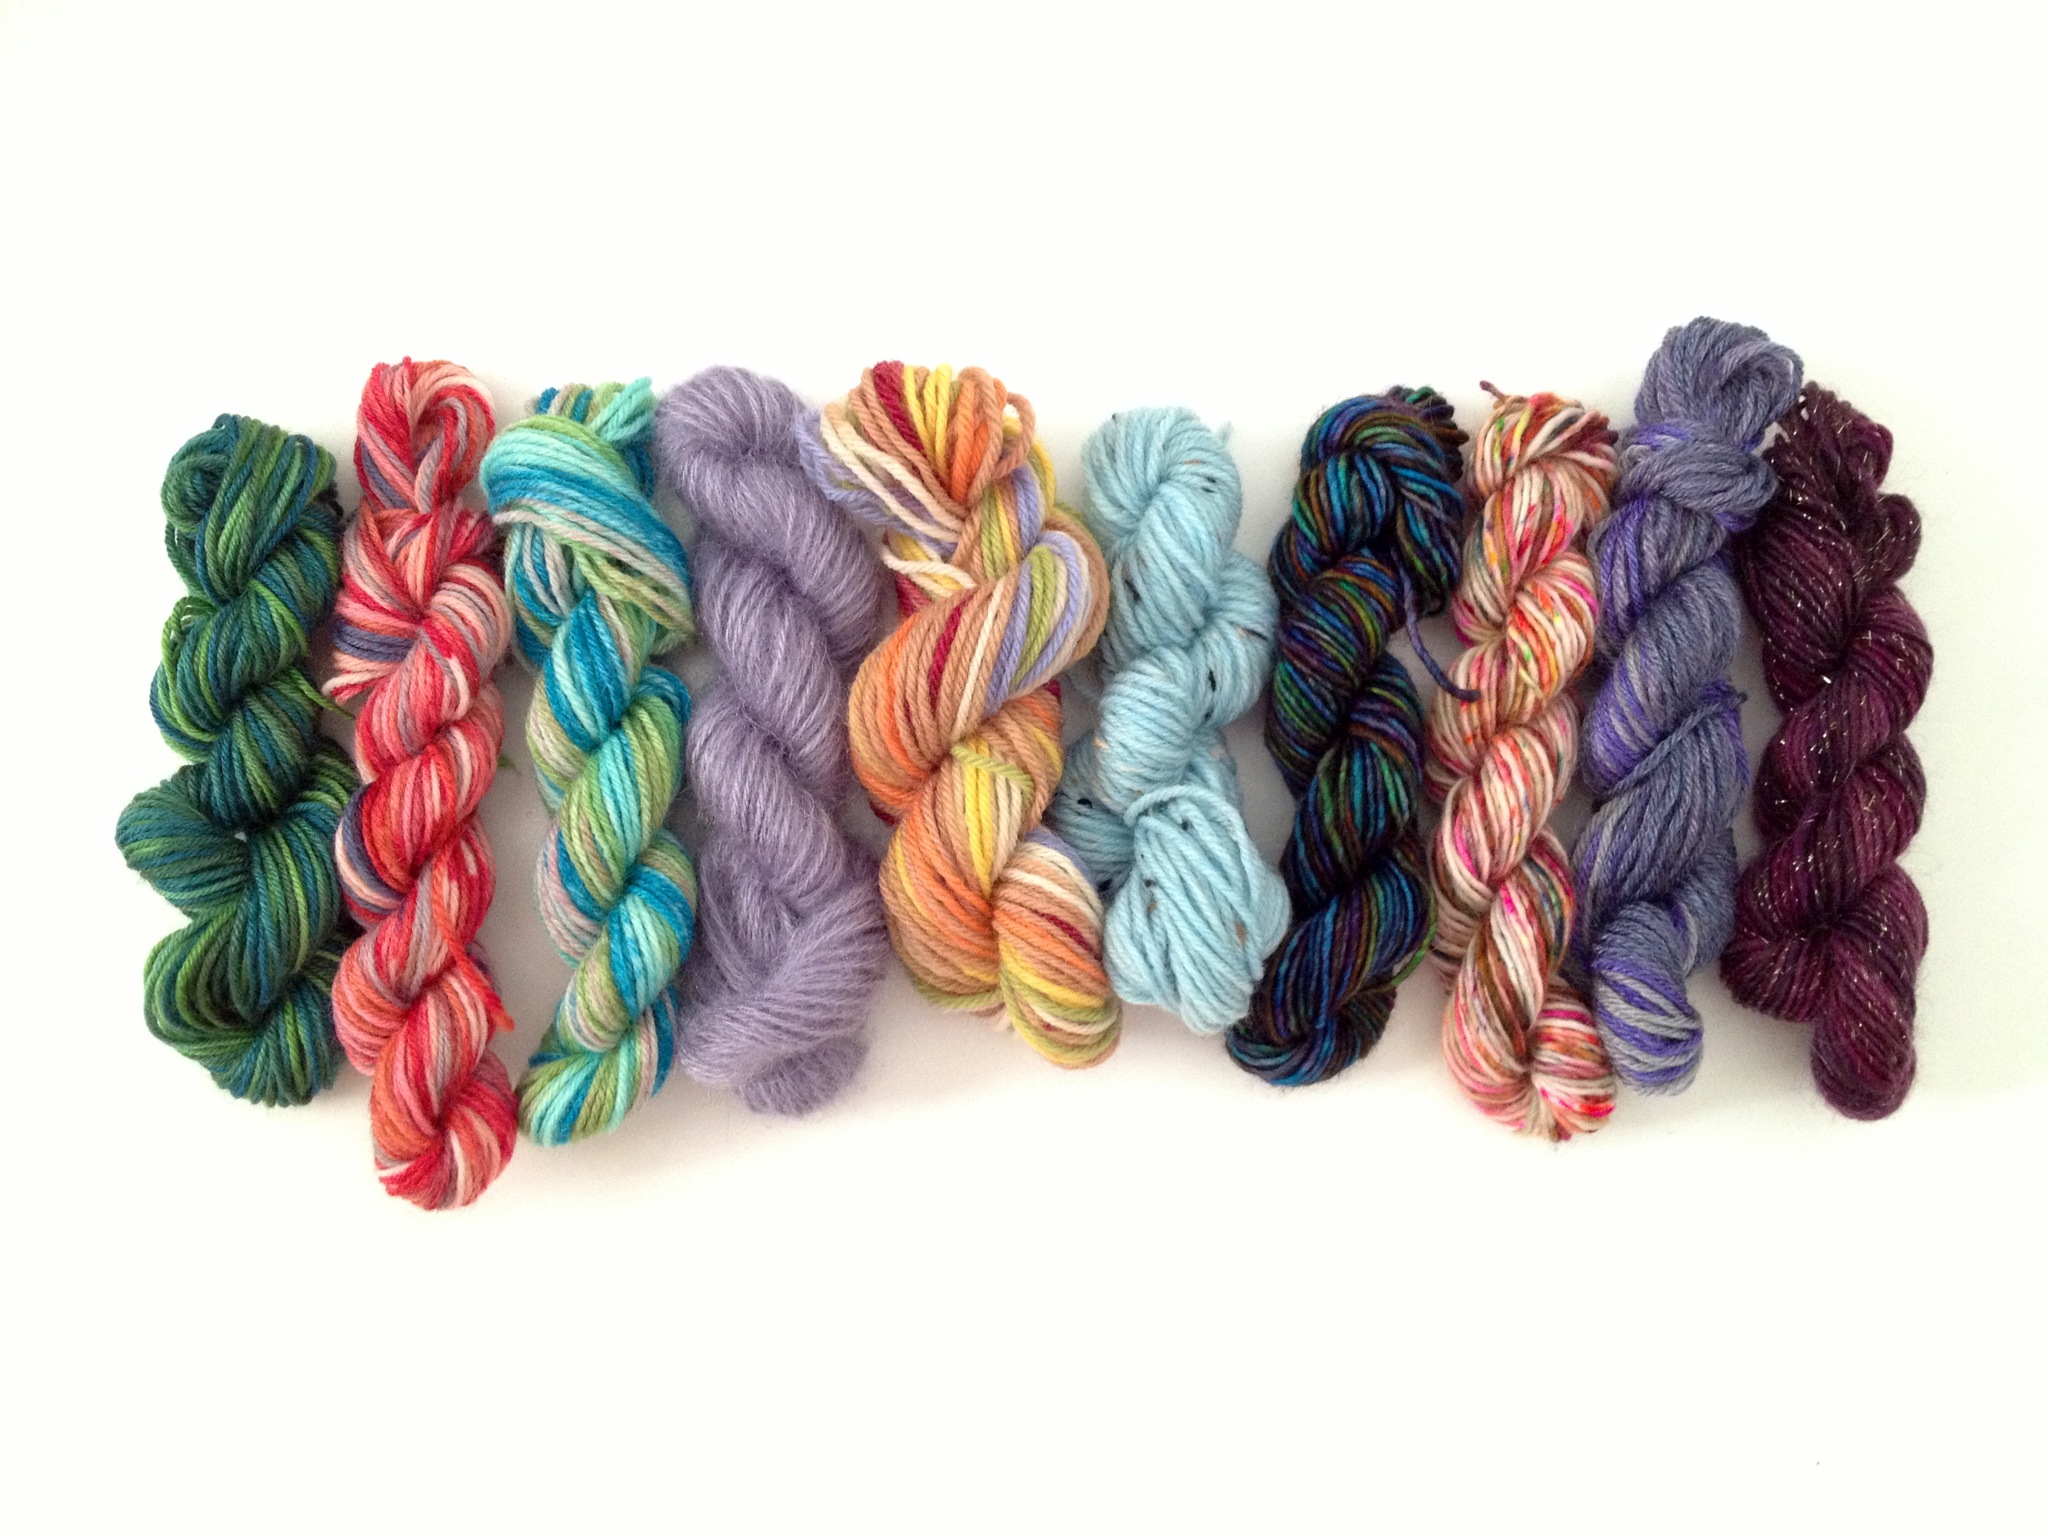
Yarn balls can be made from either one color yarn or comprised of mini skeins of various colors. If you haven’t joined the mini skein revolution, I highly recommend you check out the Beekeeper’s Quilt or tinyowlknits charms. Warning: these patterns are extremely addictive!
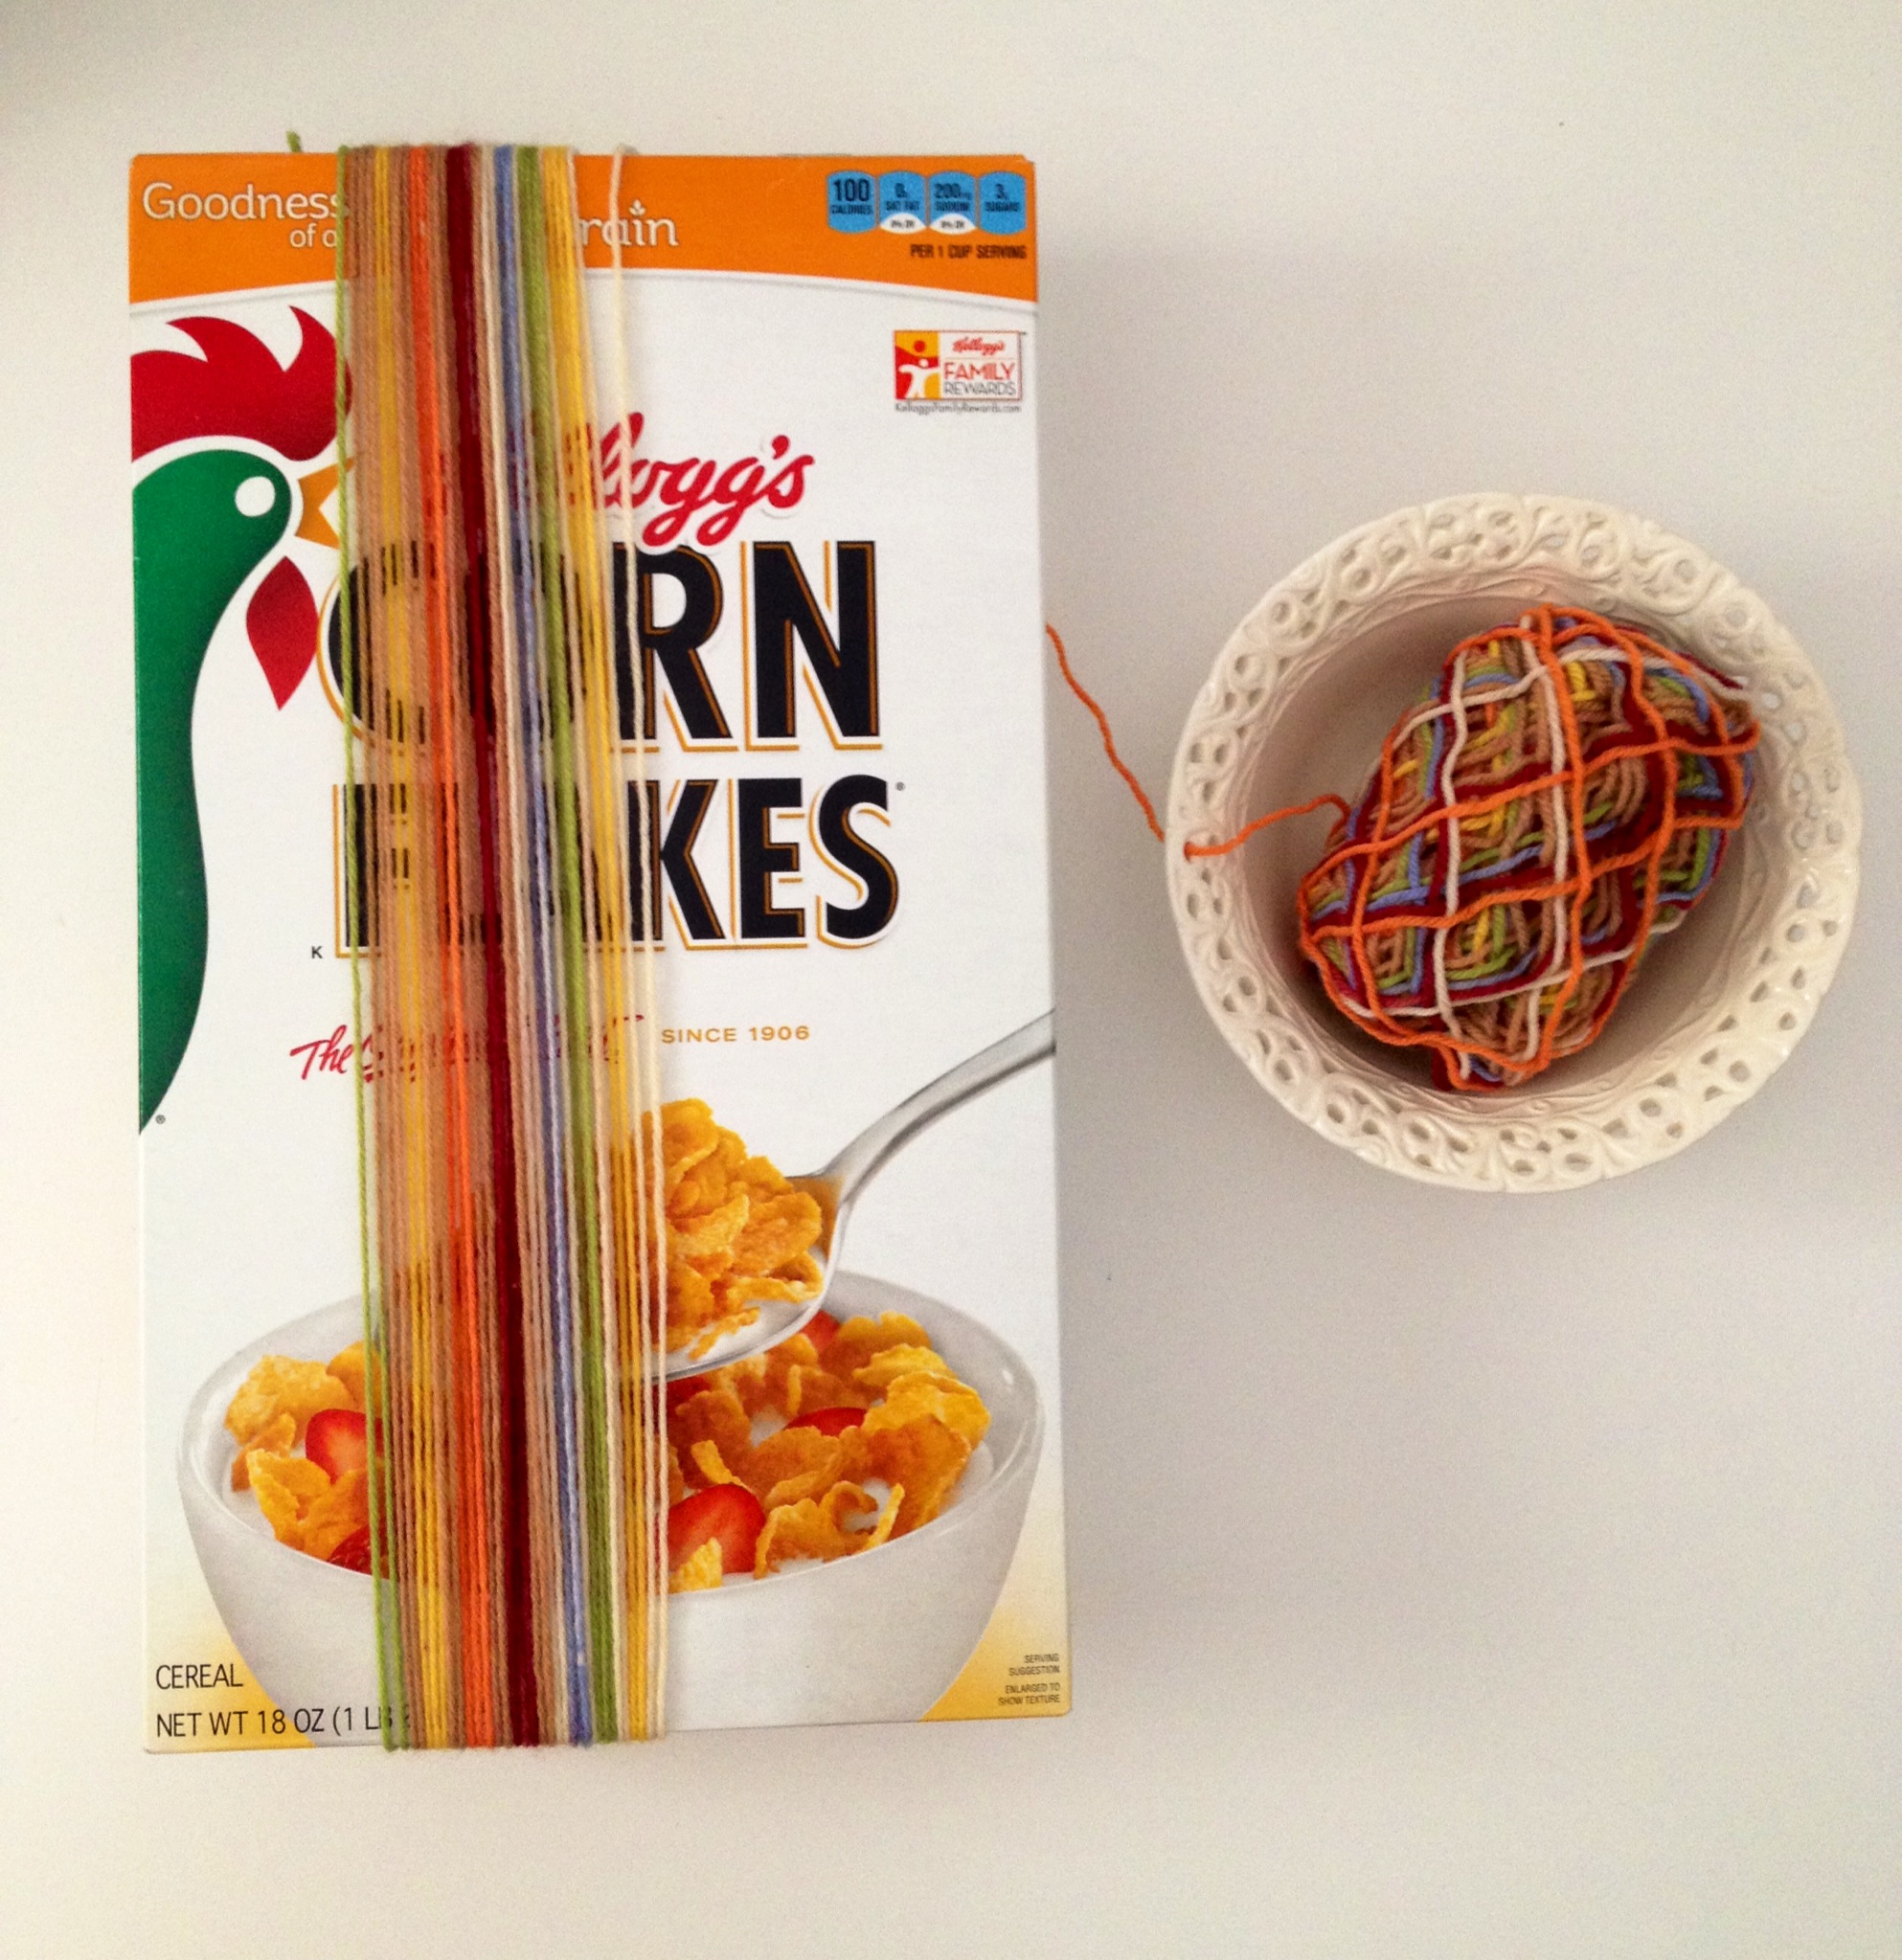
If you’re making magic yarn balls for hexipuffs, you’ll want to measure out mini skeins in increments of 15 yards per puff for fingering weight yarn. This can quickly be done by weight of the yarn or measuring length. Personally, I don’t own a fiber or kitchen scale, so I grabbed a cereal box with which to measure. If you have a yarn bowl or similar substitute, grab that too! My box is 33 inches around (so a little short of 36 inches needed for yard) so (rounding up) I wrapped my yarn around it 17 times to make a slightly longer than 15 yards hexipuff mini skein. Next I decided to make my skeins double length for two hexipuffs of each color, so I kept wrapping until I reached 34 wraps per skein. Then using the instructions in this youtube video, I twisted the yarn into a mini hank for safe keeping.
After I measured out all my mini skeins, I collected some treats to include in my magic ball. Treats can be all shapes and sizes. Consider including tea bags, candy, notions, small amigurumi, magnets, keychains, fat quarters of fabric, knitting needles, crochet hooks, washi tape, etc. I intentionally did not choose potentially melting treats that aren’t completely sealed such as foil wrapped chocolates or unpackaged lip balms because they could melt inside the ball and ruin the yarn. (I live in Texas so shipped items are often exposed to extreme heat.) I wrapped some of the treats in gift paper so they remain mysterious until my giftee finds them in the yarn. Some treats I left unwrapped and poking outside the ball to tease my giftee with what’s to come.
Here are some examples of prizes I selected.

Also, did you know that a mini M&Ms candy container makes a wonderful nostepinne? I don’t know who discovered this idea but it’s brilliant. They’re great for the core of a magic yarn ball and also for making mini hanks into balls later. Check out this youtube video.

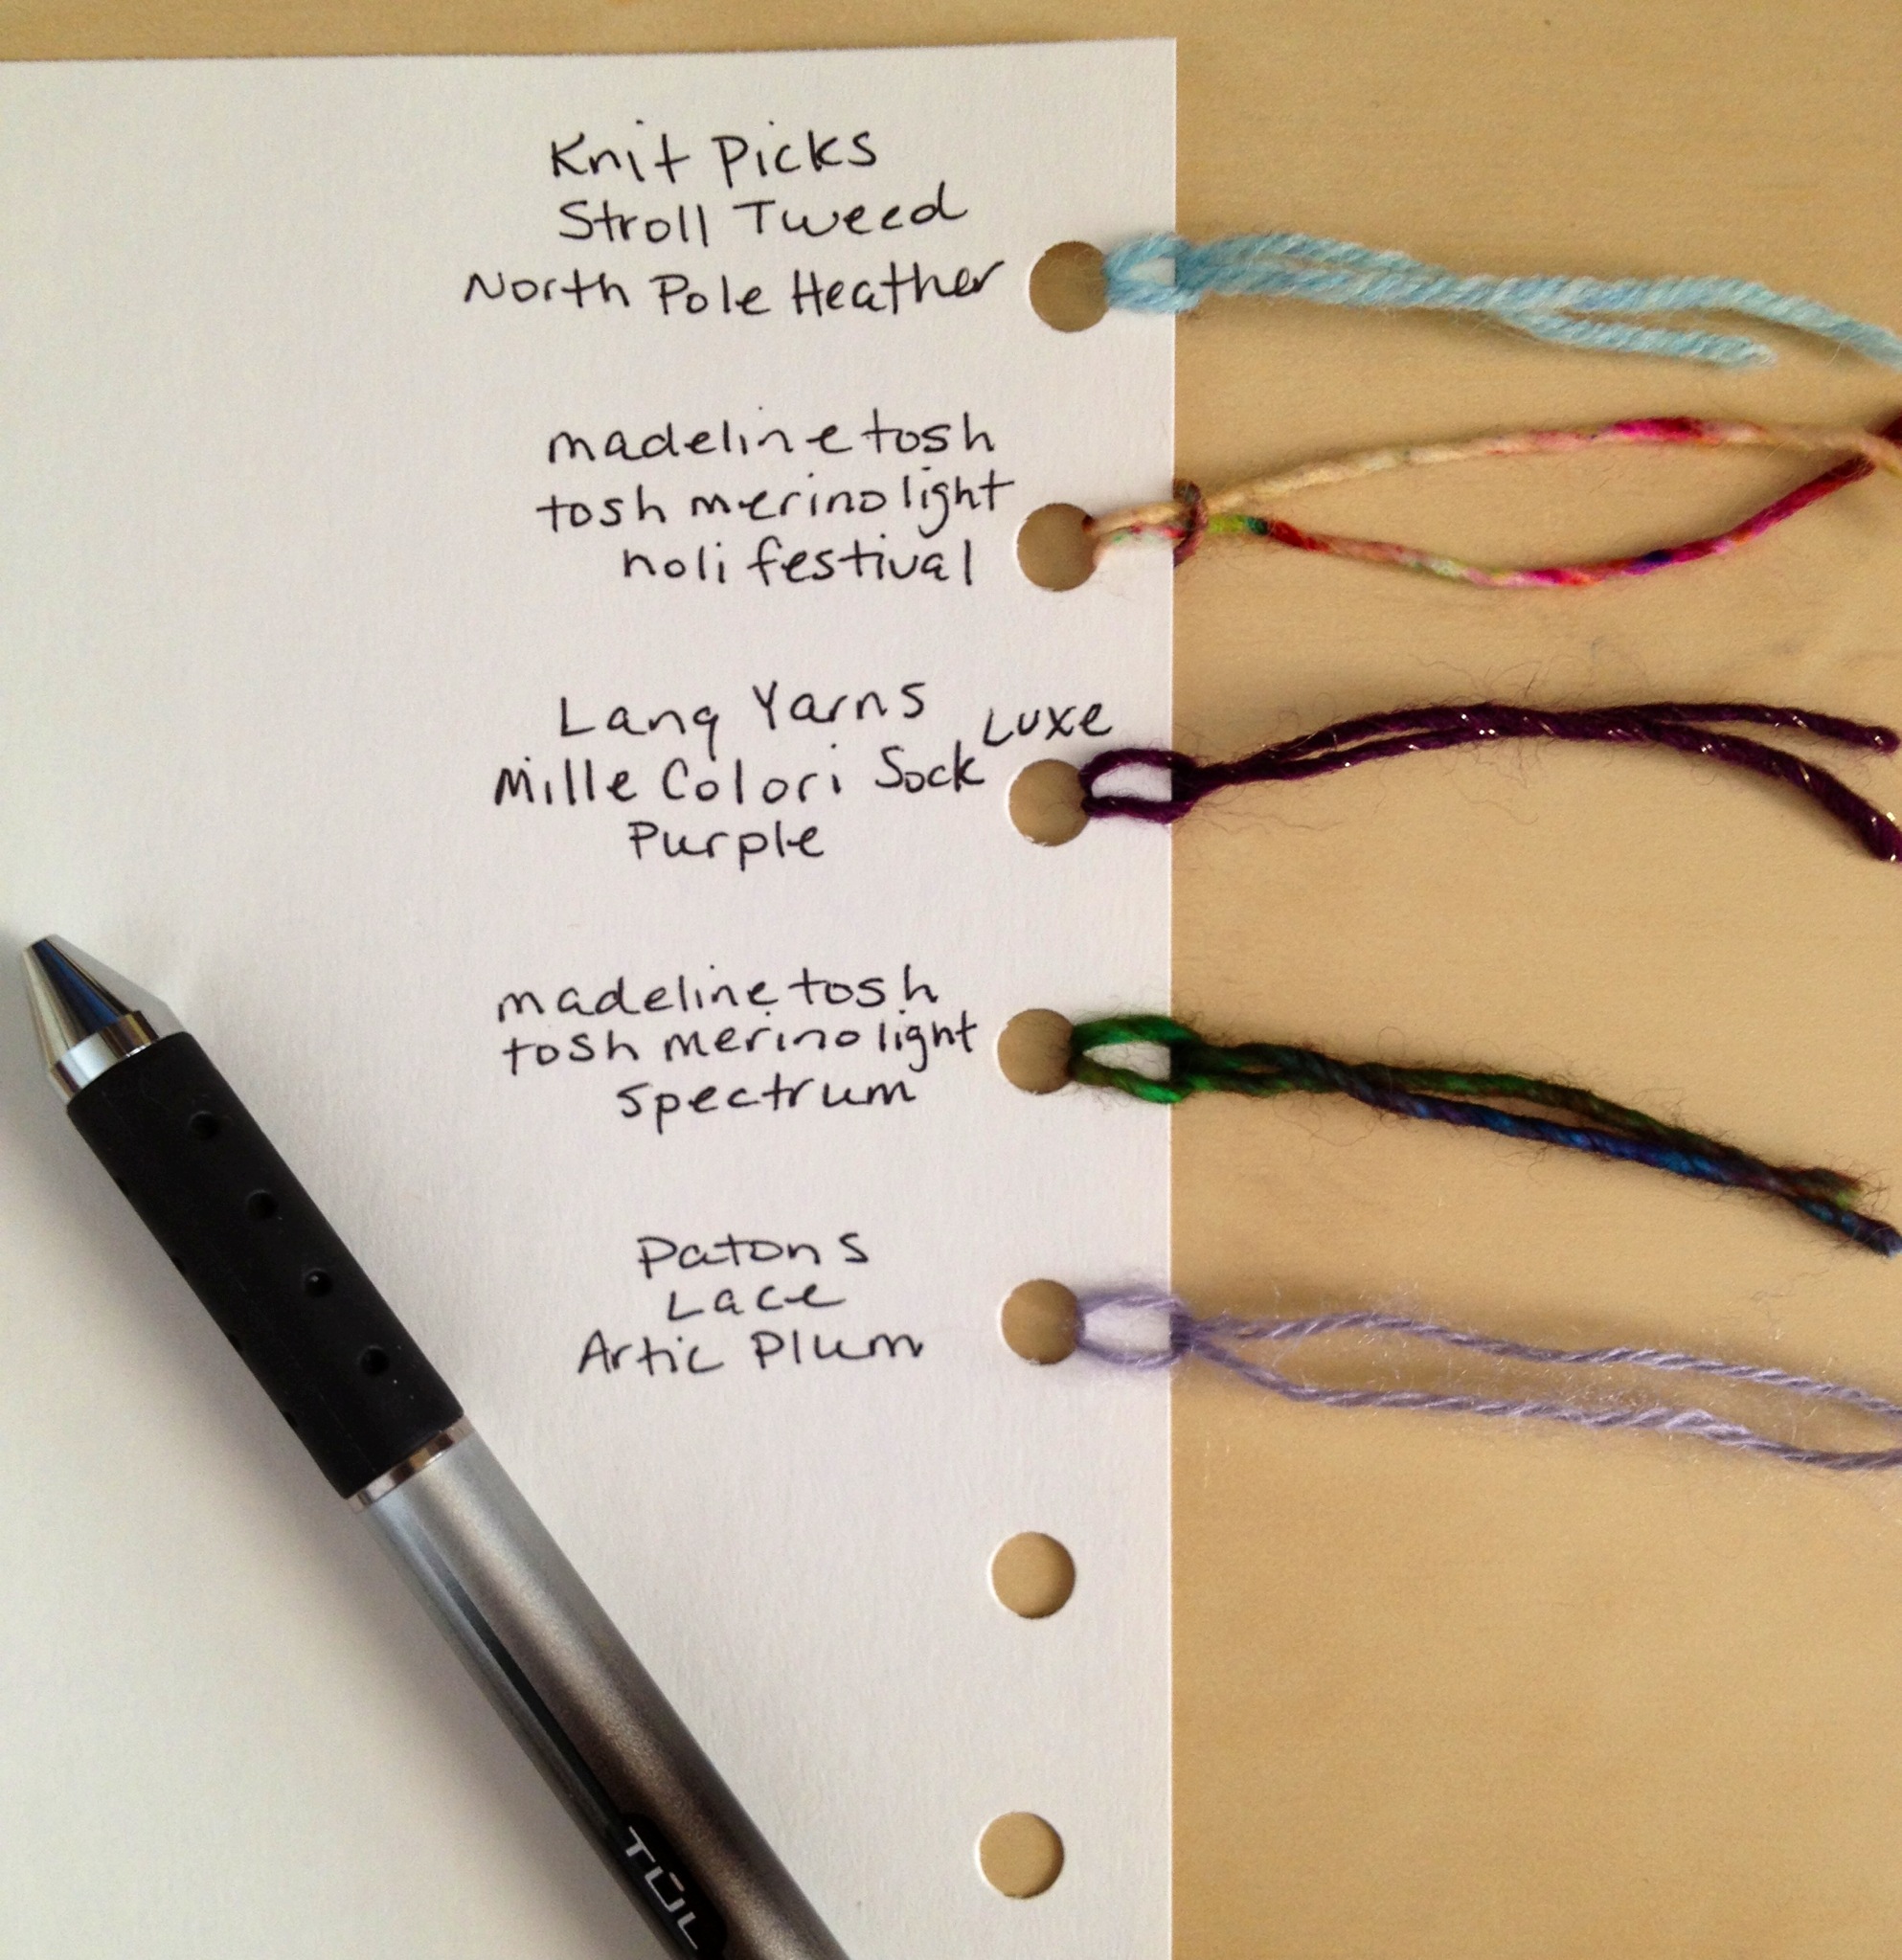
Next, consider labeling the yarns you’re using to create your ball. If you’re using a lot of different colors and brands, you may want to tie tags into the ball saying what each type of yarn is. This is a nice touch especially if your giftee falls in love with a yarn and wants to shop for more of it later. Or you could create a separate color key using a index card and a hole punch. Tie yarn samples onto the card and label the types of yarn.

Now you’re ready to make a yarn ball! I chose a treat and started wrapping the yarn around it. I tried to wrap the yarn gently, not tightly, so I wouldn’t stretch it out. As I wrapped, I added more treats wherever they seemed to fit. You’ll be surprised how many gifts you can hide in one yarn ball. Of course, the more yardage you include, the more gifts you can hide. I think I fit about 20 small gifts in 300 yards of fingering weight yarn and could have easily included more.

Once you’re done wrapping, consider decorating the outside of your magic yarn ball. Adding flowers, ribbons, buttons, bows, decorative clips, furoshiki wrap, crochet Ditty Bag , etc. will create a finishing touch and also help hold your ball together. Holding everything together is especially important if you’re shipping. Speaking of shipping, do you know what makes an awesome packing material? Polyfill! Your crafty giftee can use it for hexipuffs or other projects.

Tah-Dah! Now you’ve finished your magic yarn ball, you have a wonderful gift for the fiber geek in your life!
I’d like to thank my ravelry.com friends, Hoffmala and DollyFaceKnits, for their inspiration in making magic yarn balls. Hoffmala created the wonderful pink yarn ball pictured in the examples.
Got some other ideas on how to make magic yarn balls? Please add your ideas in the comments!
Ravellenic Games Finish Line
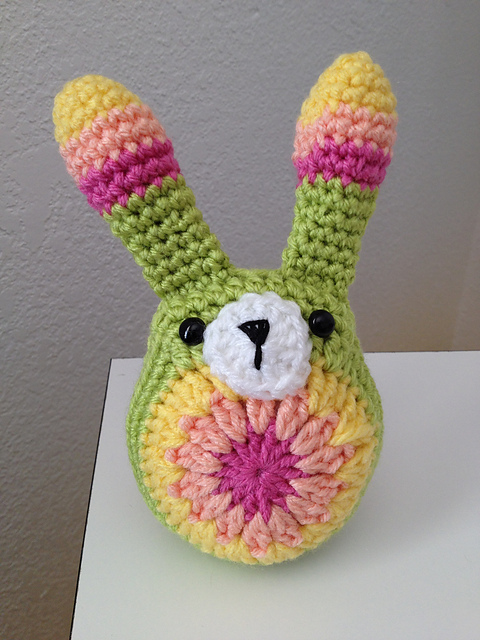
This was my first year to participate in the Ravellenic Games on ravelry.com. If you aren’t a raveler, these games are like NANOWRIMO and the Olympics combined. The goal is to challenge oneself and complete projects within the same time limit as the Olympics. I had some successes and some failures. I didn’t complete my most ambitious knit for the games, a BFF Cowl. I did however finish a couple of smaller projects including an adorable bunny from The Green Dragonfly and some sweet Travel Owls by Morning Cup of Jo. I was really surprised and honored to find my Rav Games bunny was featured on the Ravelry home page on February 24!

Learning the lucet!
As a lover of fiber arts, I want to try it all! Knitting, crocheting, weaving, spinning, dying, just to name a few! This includes developing even more obscure talents, like making lucet cords. What the heck is a lucet you might ask? (I did!) A lucet is a type of braiding fork that dates as far back as the viking era and produces a square cord, not completely dissimilar to its rounder cousin, the i-cord. I started off with a lovely little lucet from StichDiva.com and this youtube video.
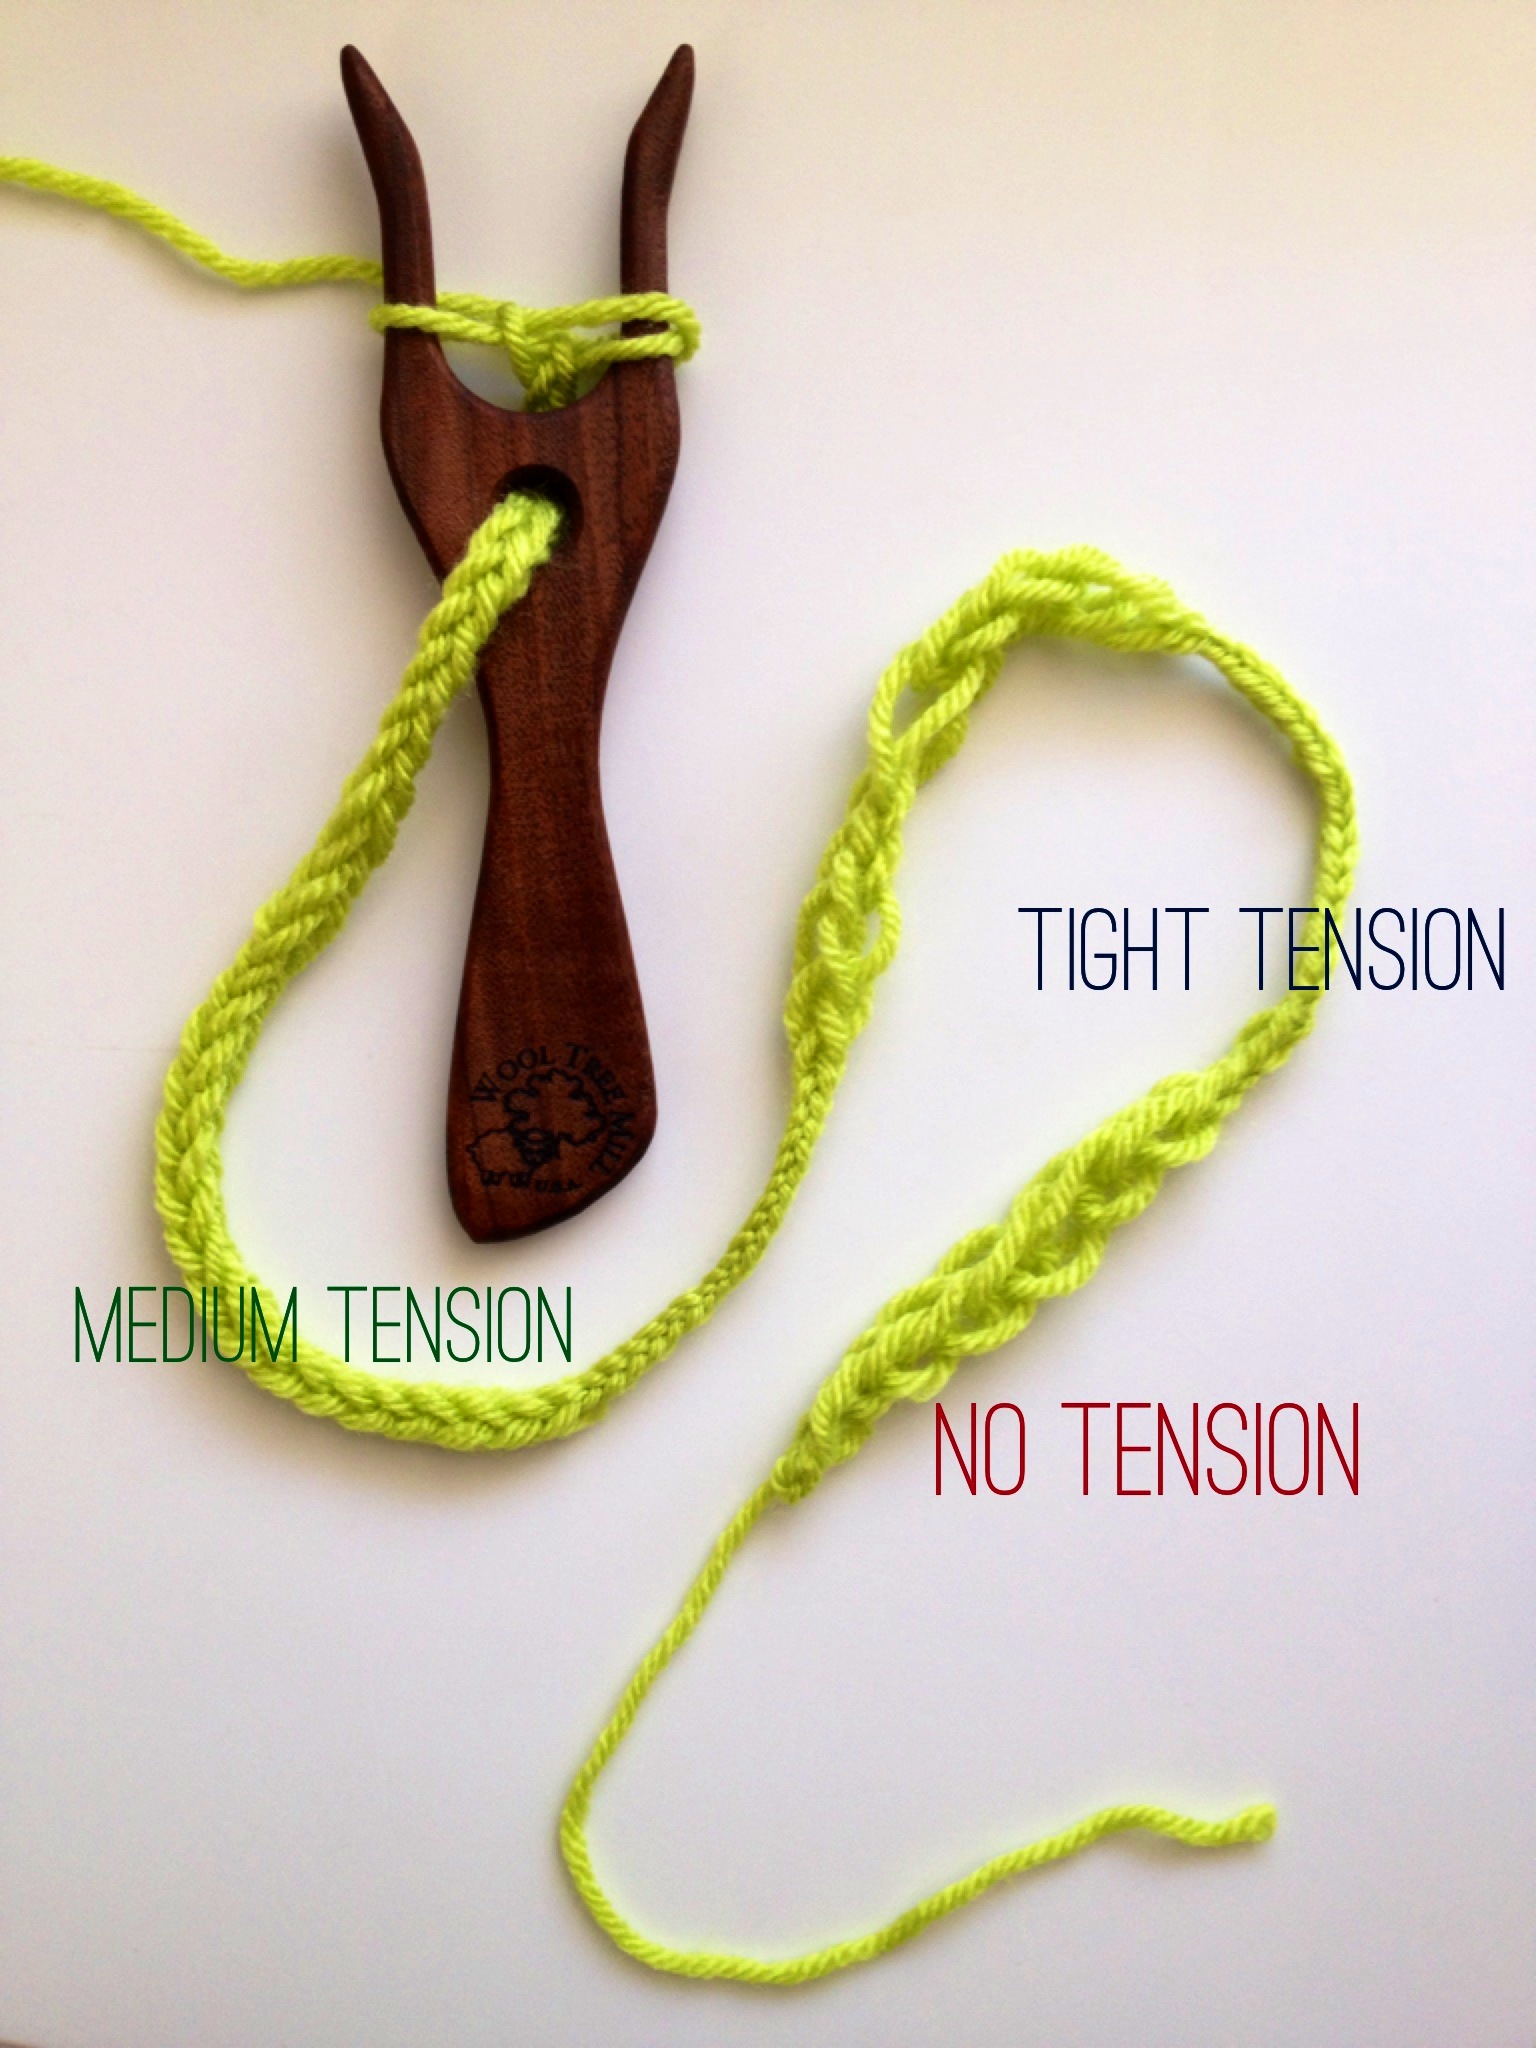
One interesting thing about lucet making is the tension isn’t controlled by the size of one’s lucet fork. This is a lot different from a knitting or crocheting perspective, where the size of your needles or hook helps control the size of the stitches. On a lucet, it’s how hard you pull the yarn during the braiding process that makes your cord tighter or looser.
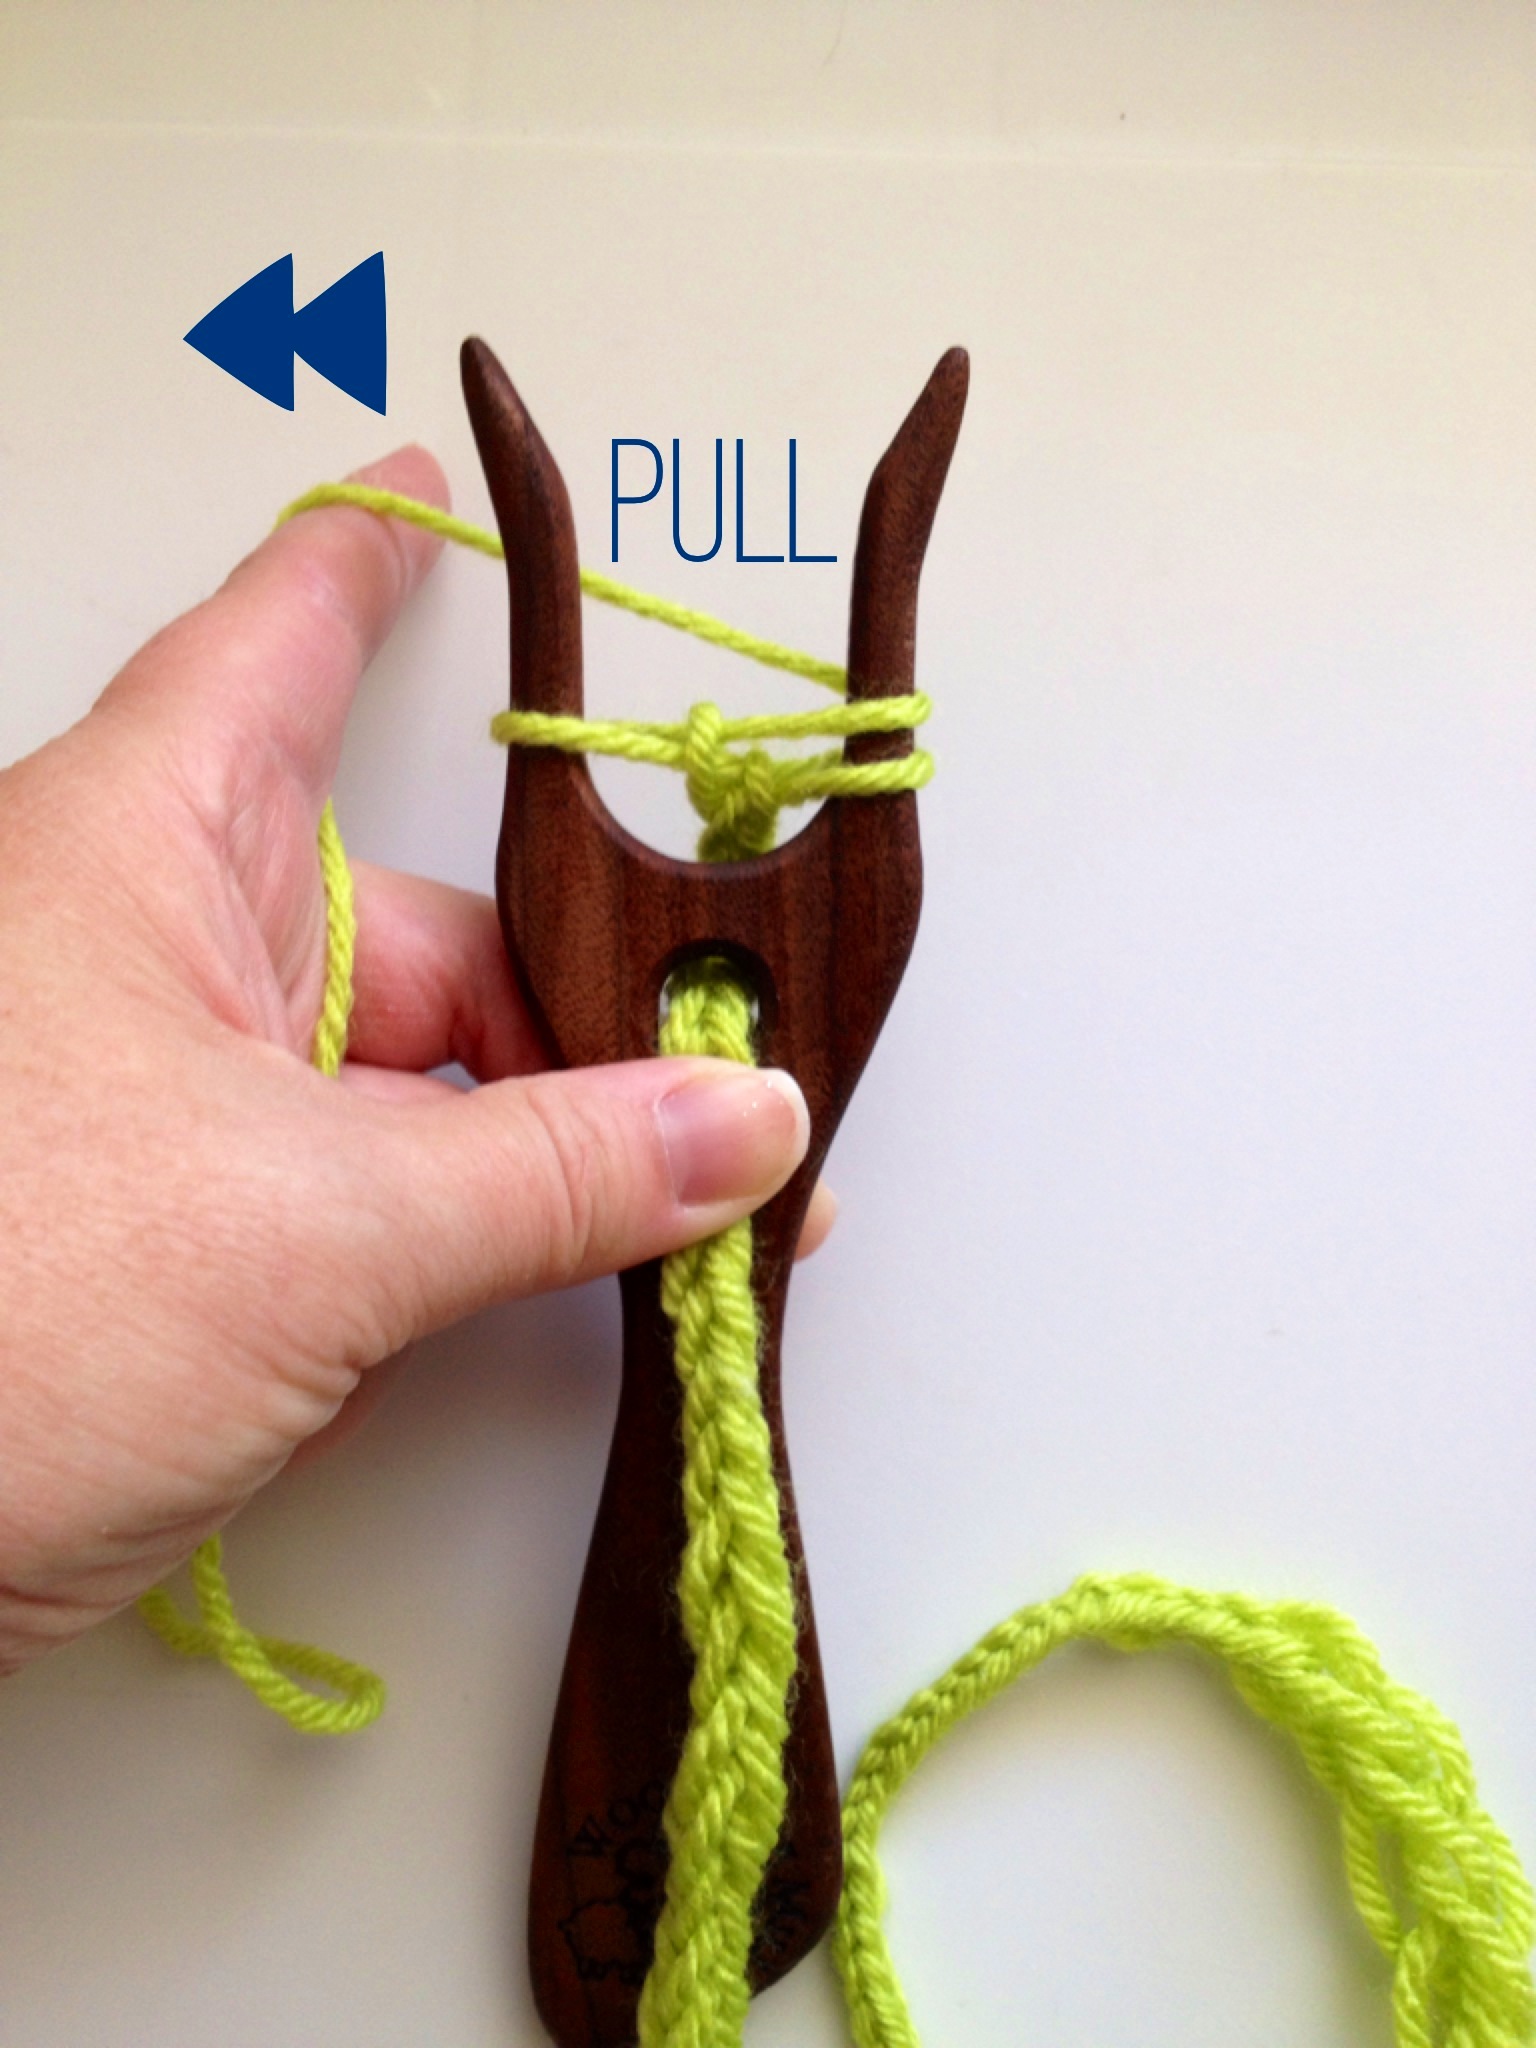
Always keeping the cord centered between the two fork prongs, you have to pull to tension after each wrap of the yarn:
And depending how hard you pull, you end up with different results:
So once you’ve made a lovely lucet cord, what do you do with it? Well, it can be all kinds of things: drawstrings, bracelets, necklaces, scarves, embroidery for costumes, a jump rope, a noose…. okay, maybe not those last two. But basically, anywhere you might use an i-cord, you can use a lucet cord as well!
Cheshire Cat!
If you are as amigurumi obsessed as I am, you may have noticed the voyages of djonesgirl’s pirate cat around the internet on Craftster, Flickr, Pinterest and more. Inspired by her adaptation, I decided to make one of my favorite characters of all time: Wonderland’s Cheshire cat. Here he is:

This pattern is from a Japanese book dubbed by English readers as “Japanese Amigurumi Collection Volume 2”. It’s available via etsy.com or ebay.com. The charts are fairly easy to follow if you have some previous ami making experience. I love that it is a great “blank canvas” pattern that you can adapt to make into any kind of cat you want.

Felting is Contagious
I finally caught the felting bug. For years, I never understood why people would bother to knit something huge, only to have it shrink into something small. It always seemed counterproductive to me. If you want a small thing, knit a small thing. It’s faster. Now that I’ve caught the bug, I realize I completely missed the point. Felting wool is magical!
Felts transform to create wonderfully sculptural pieces that are thicker and more durable than their unfelted counterparts. Felted bags and baskets won’t let your pens and needles stick through, so you don’t have to line them. Your delicate wool normally too weak for daily use becomes more hardy and long lasting.
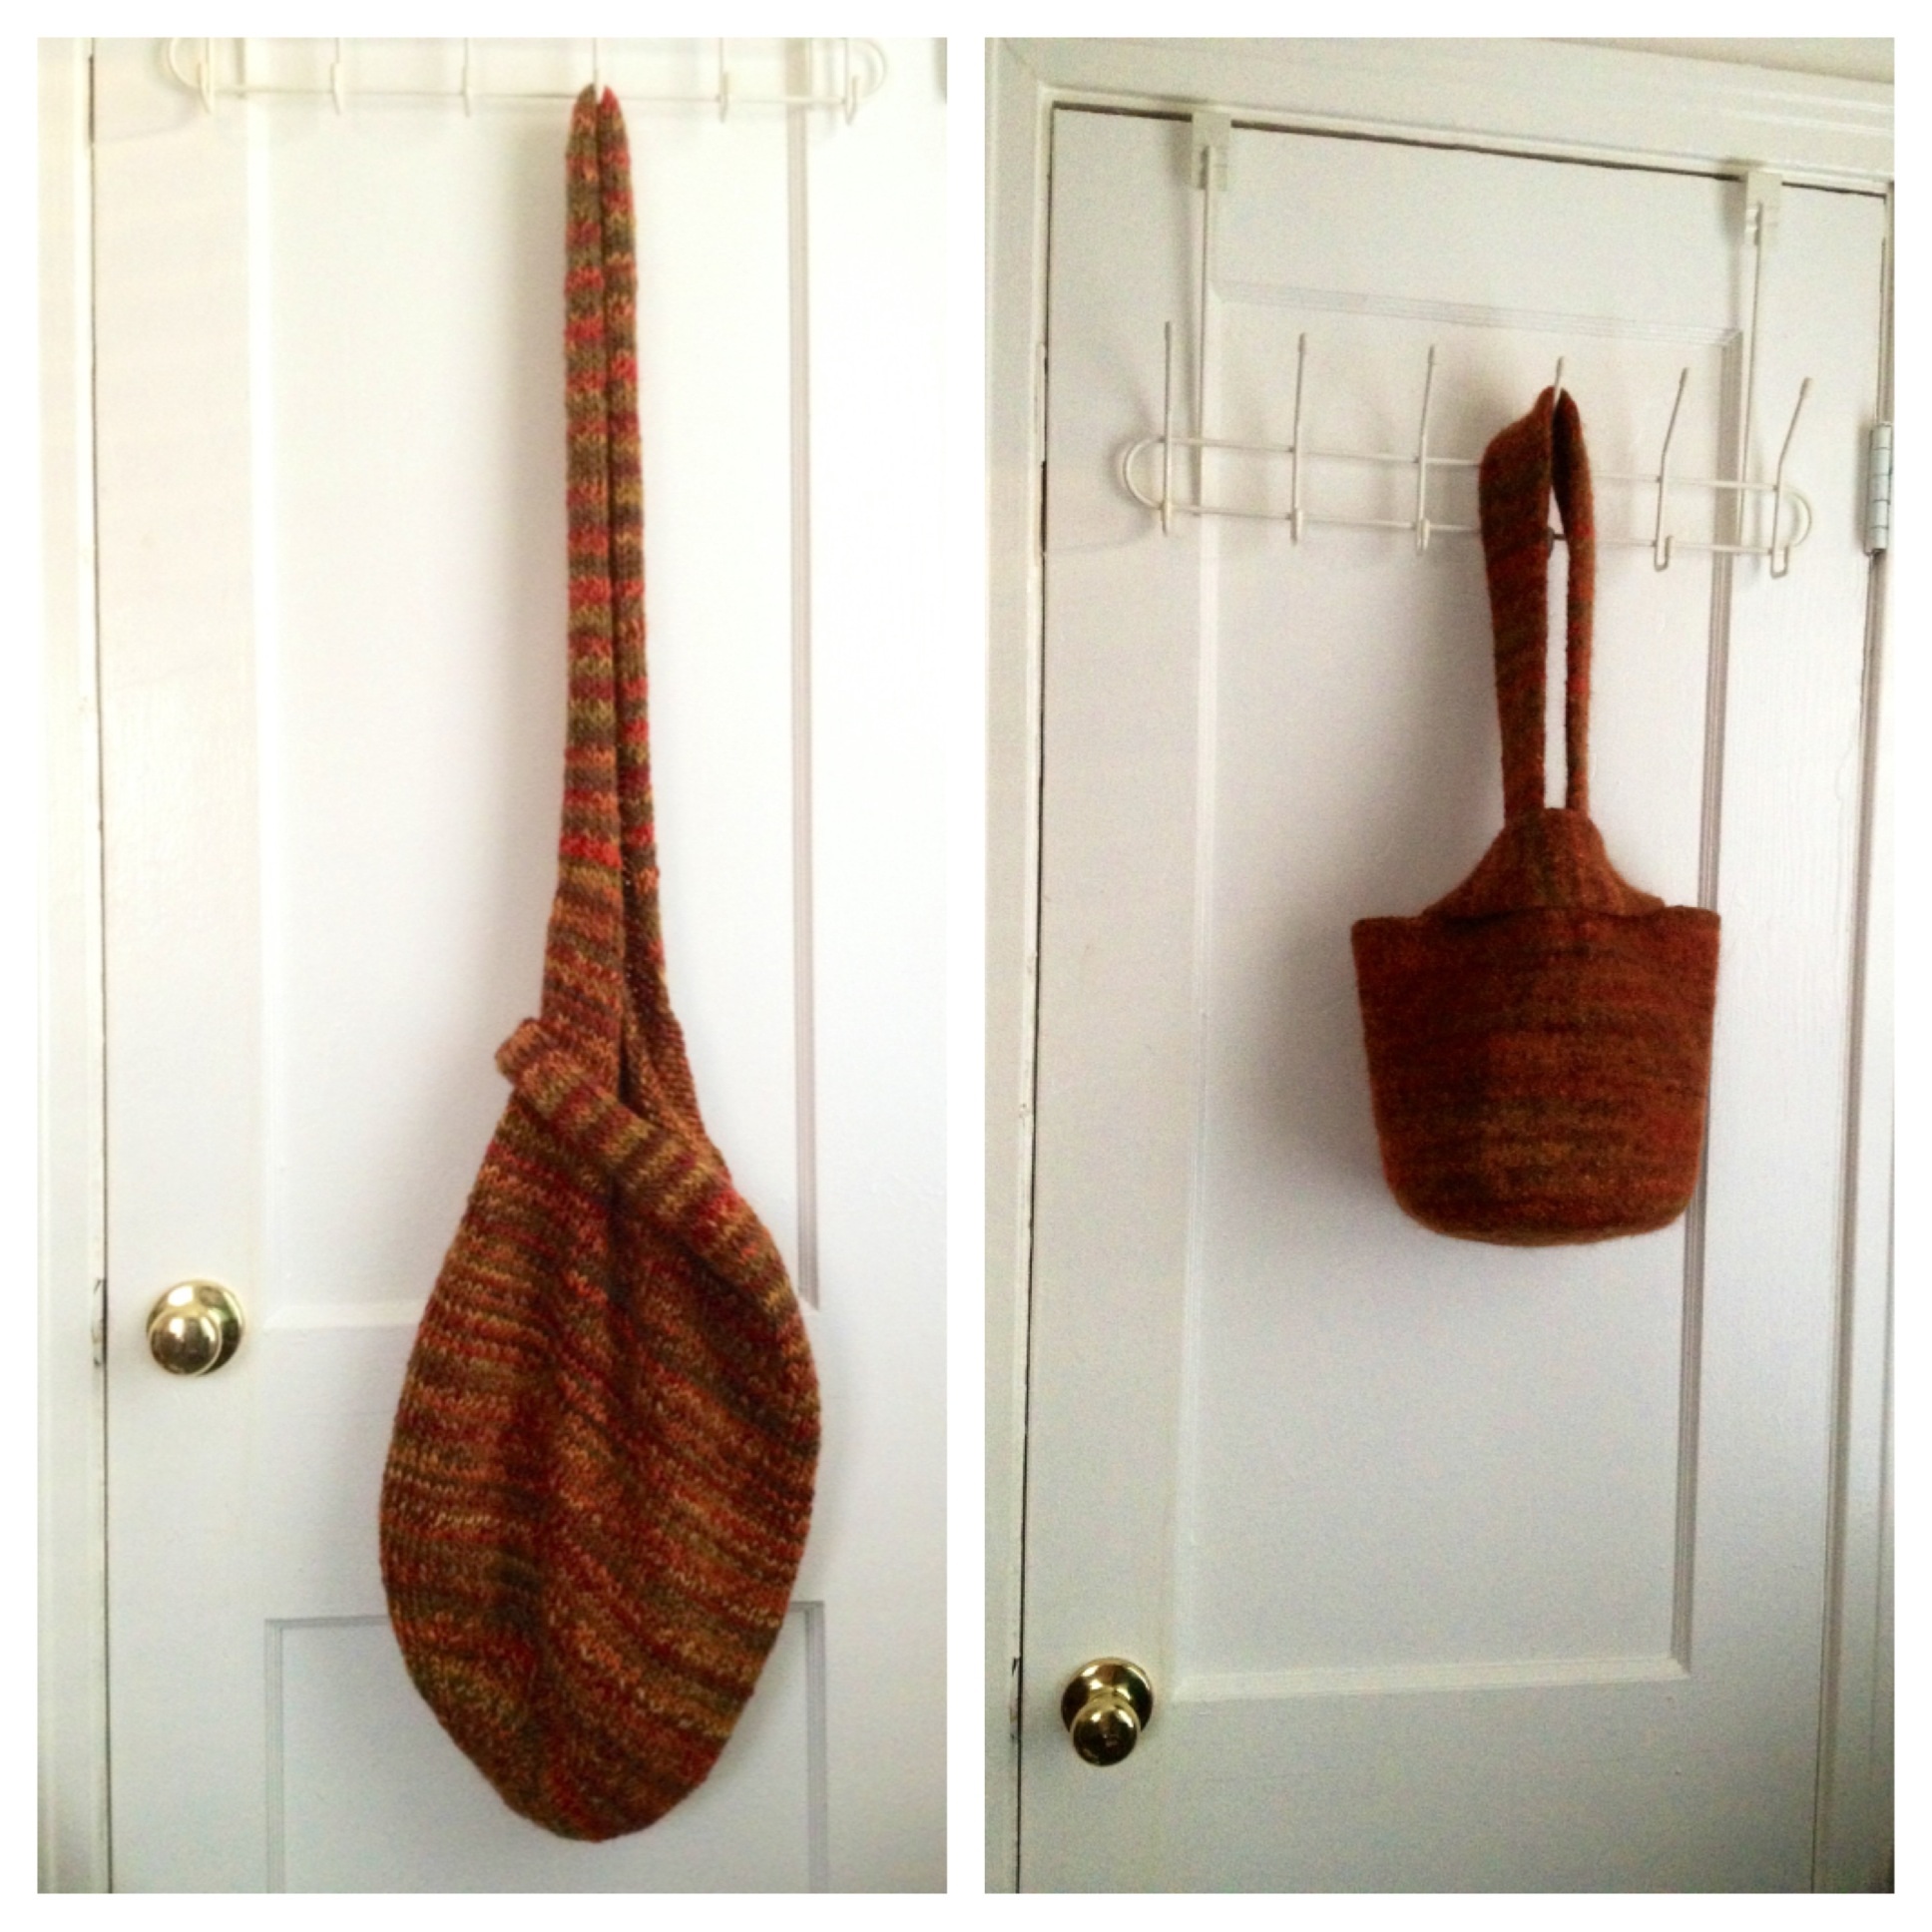
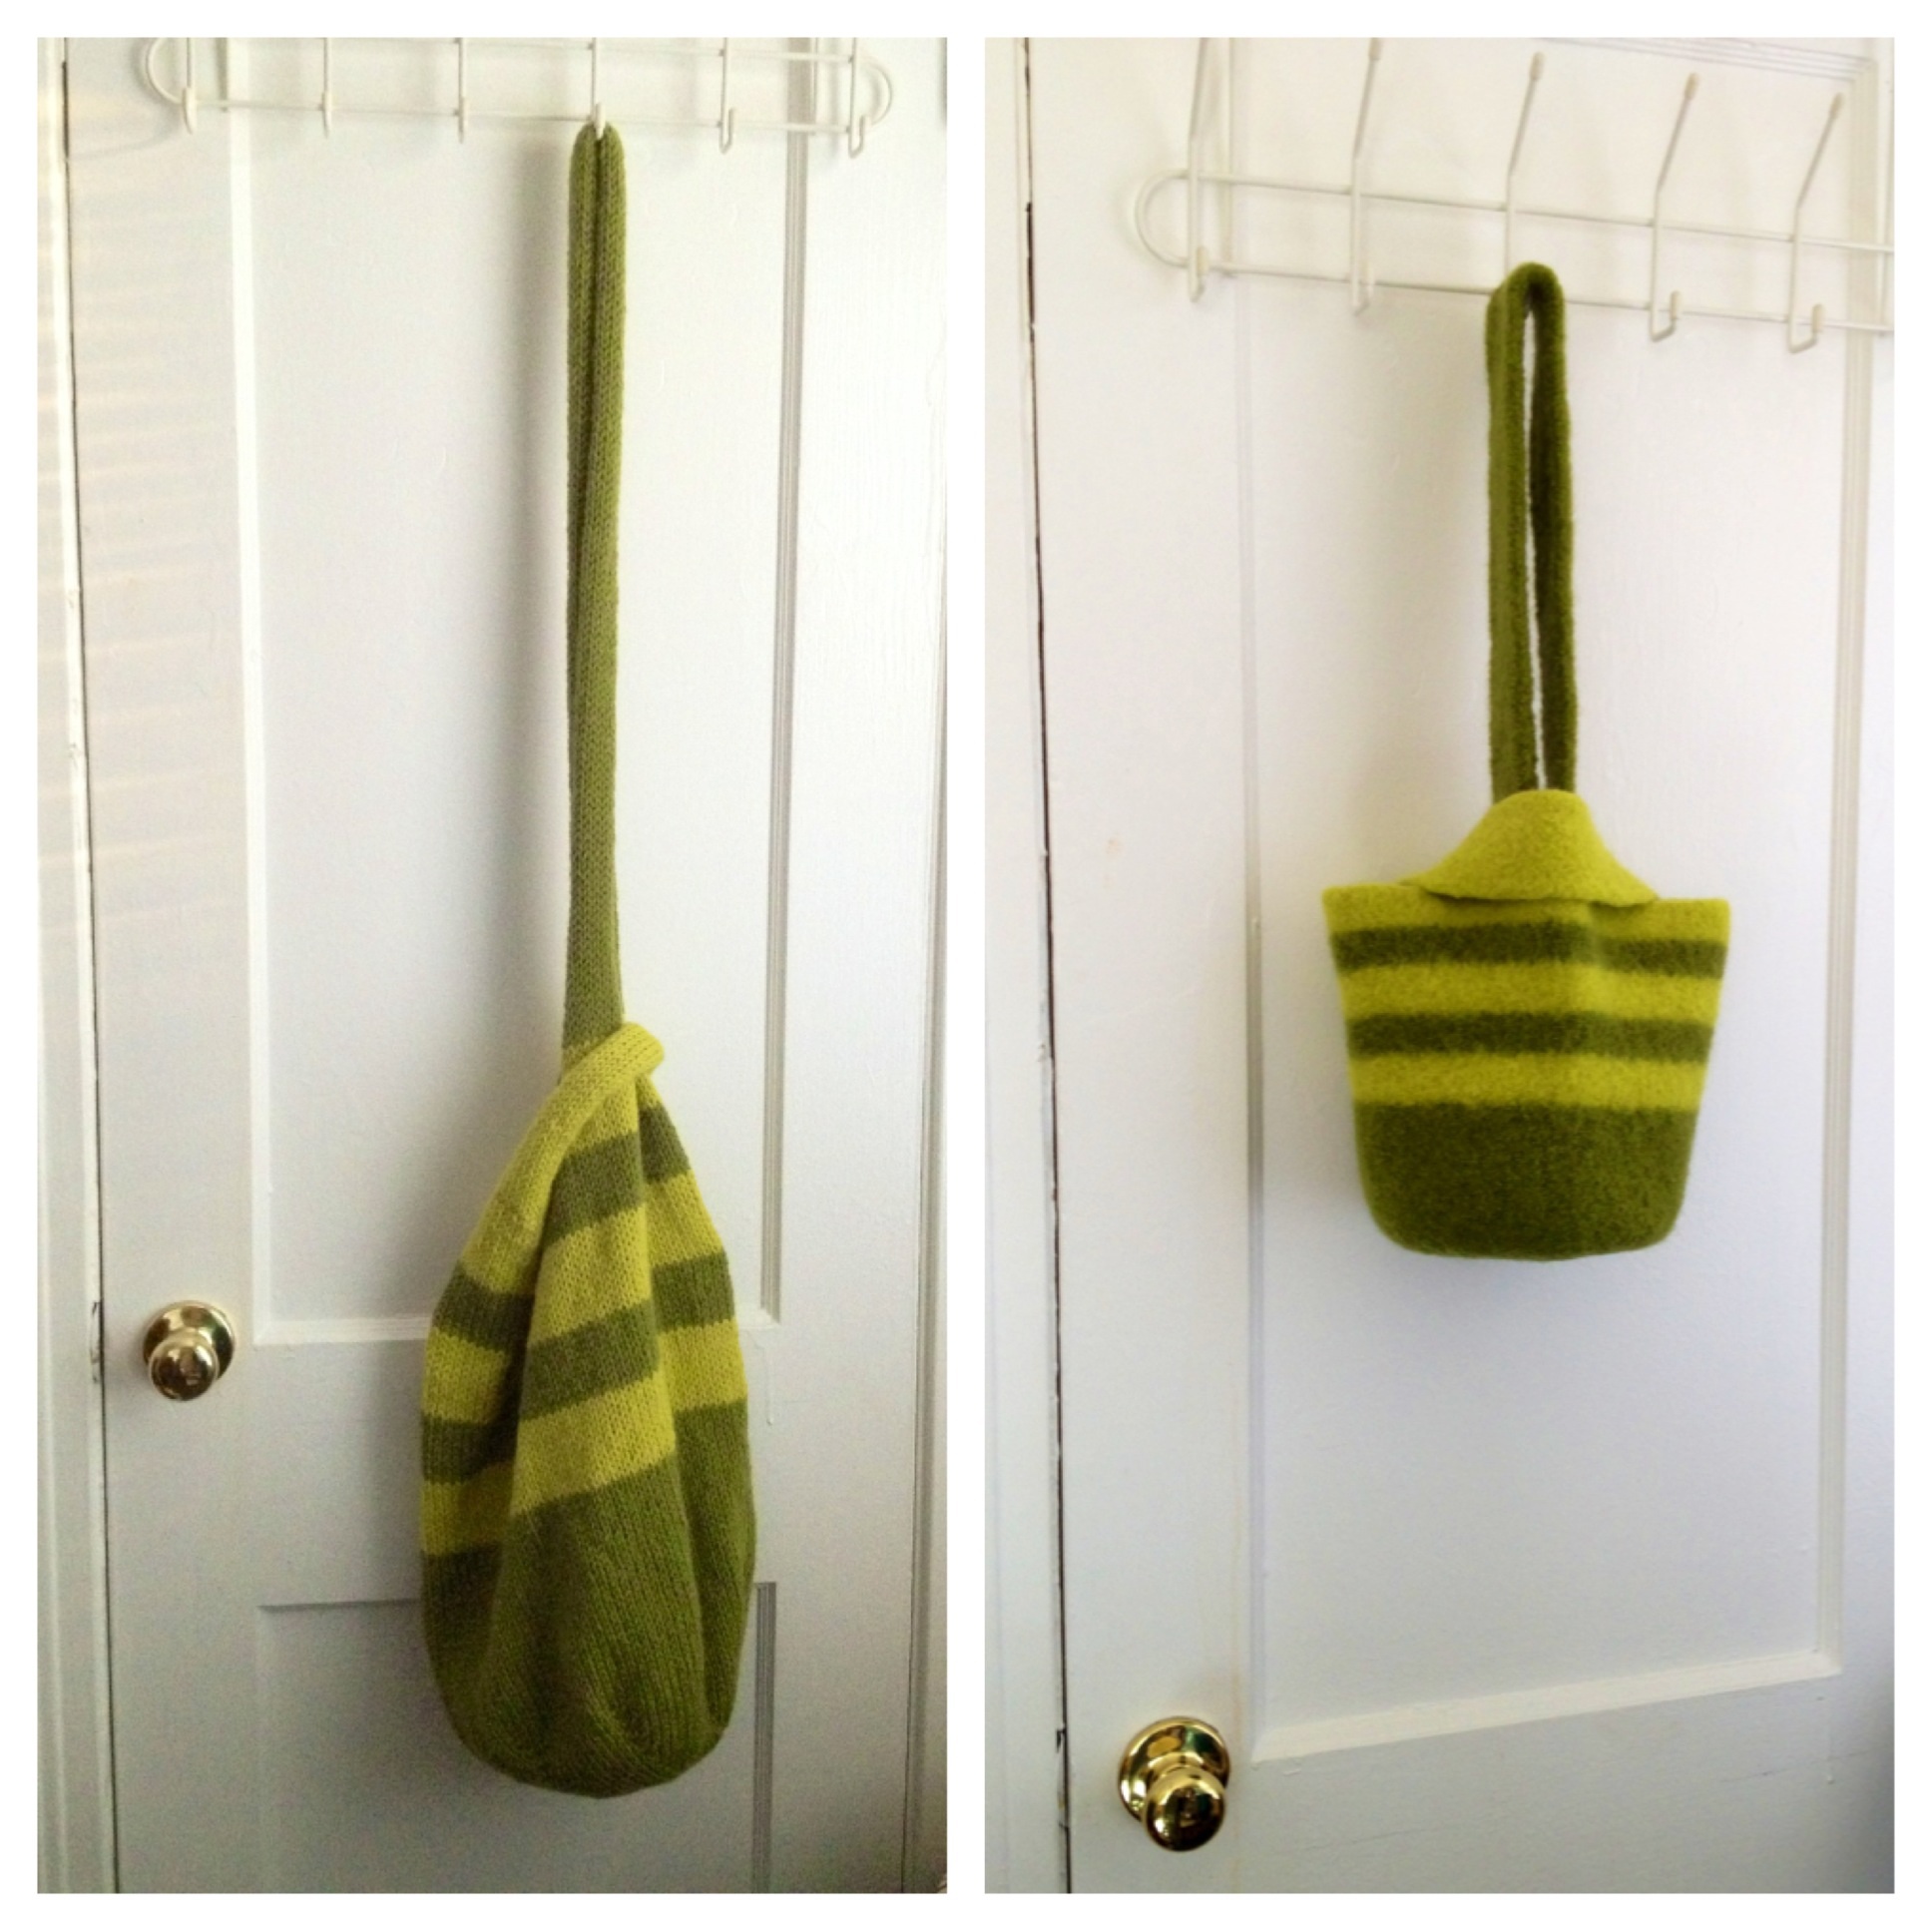
Here are some results from my recent felt adventures. First, the Lucy Bag – it’s styled after Japanese Knot Bags (love!) and is totally addictive knitting. I’ve made two so far and had to force myself to take a break to finish other projects promised to people. Otherwise I’d probably have a few more by now. This great stash-busting bag closes itself so no zippers or other fussy finishes are needed. This isn’t the easiest pattern to find, but you can order it here from Blackberry Ridge Mill. The orange bag was knitted with Twilleys Freedom Spirit Chunky yarn (bulky). The green bag was knitted with Patons Classic Wool (worsted). Both of these are great feltable yarns that create completely opaque and firm fabric.
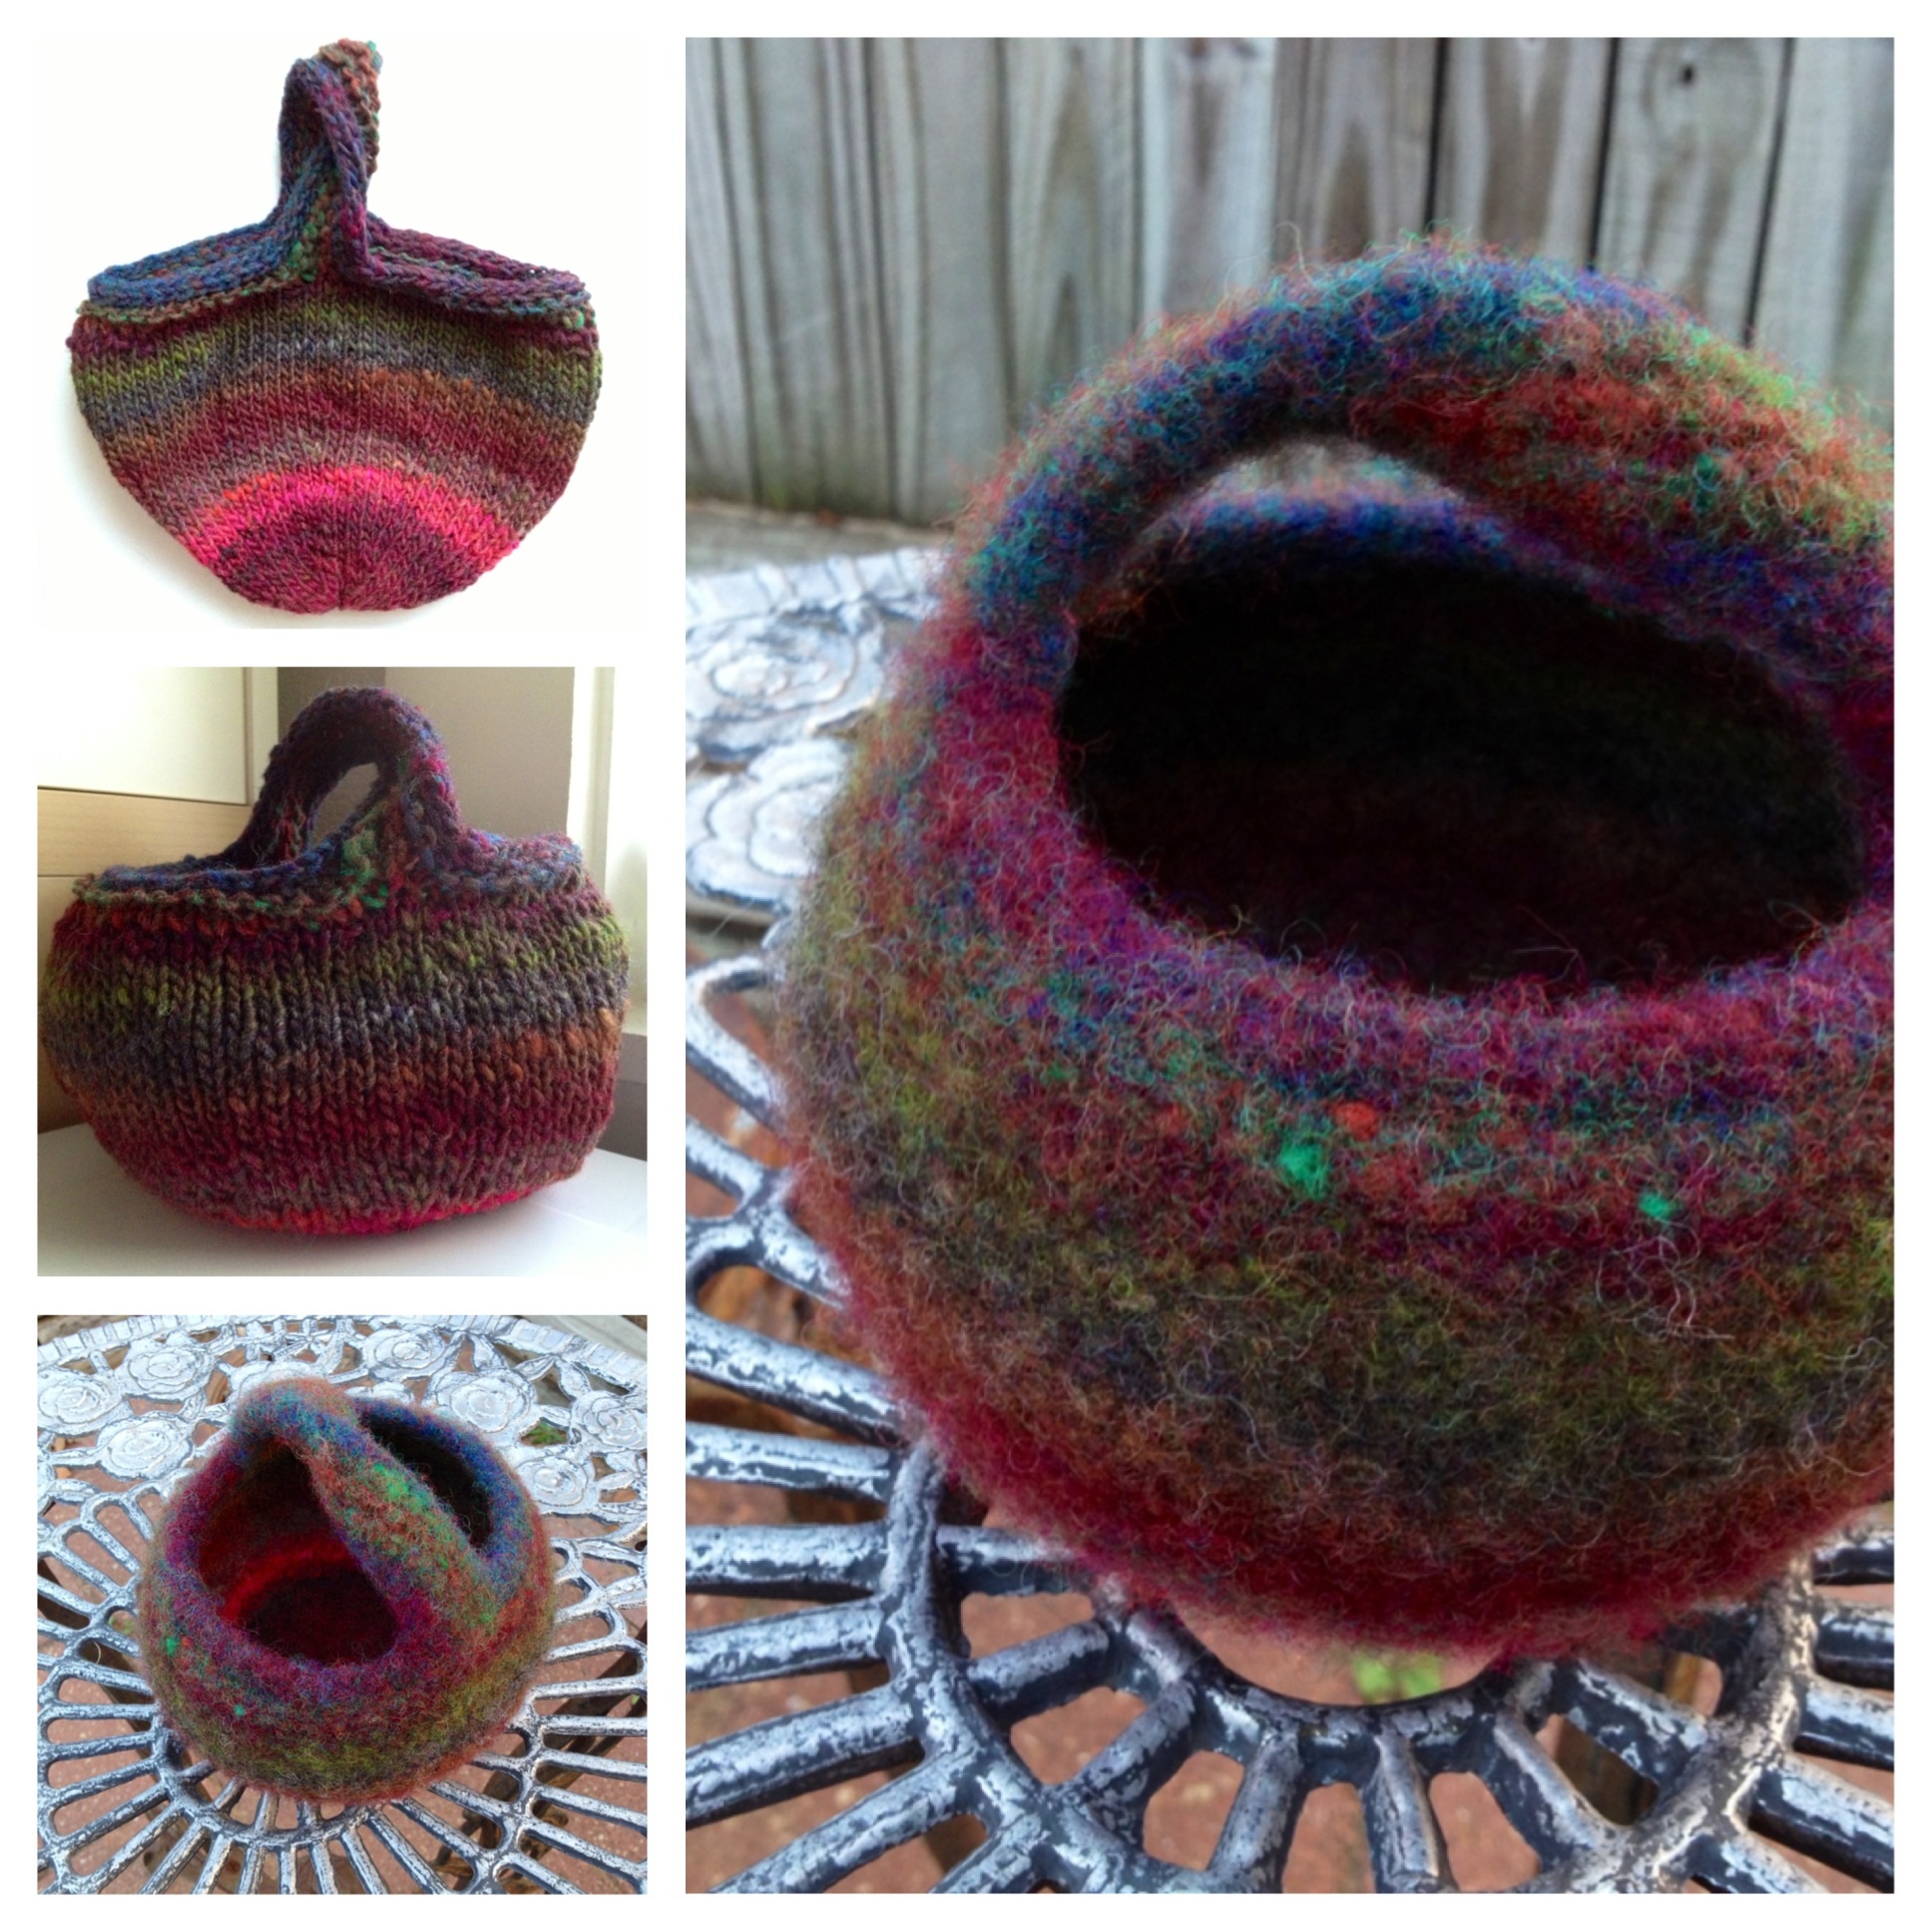
Next, I made this Moebius Basket by Cat Bordhi. Cat’s moebius patterns are a little intimidating at first but completely satisfying once you get past casting on. This video is extremely helpful to get you started. I used Noro Kureyon yarn which felted into a soft, colorful fabric. The basket holds it’s own shape but just barely. I can still see through the stitches when the basket is held up to the light. I plan to try this project again with a firmer felting yarn. This yarn might be more suitable for something you want to be soft and flexible, like slippers, rather than a more sculptural piece that needs structure.
What are your favorite and least favorite felting yarns? What are your favorite felted projects? Leave a comment on this post between now and the end of February (2013) to enter to win a surprise felt!
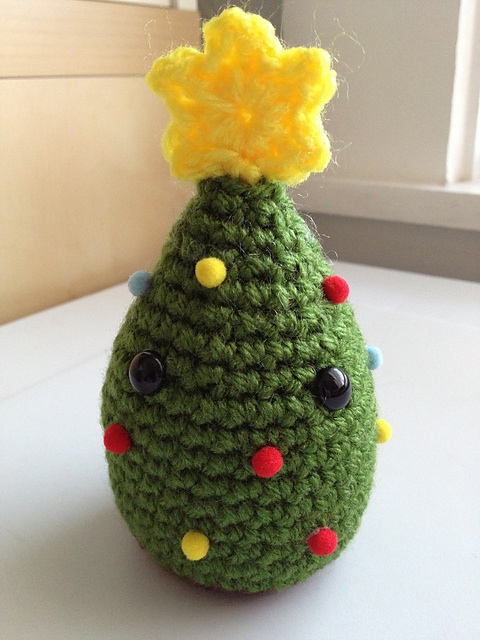
Merry Christmas!
Hope you have a very merry Christmas! Make your very own tree friend: Ravelry Xmas Tree Pattern
Breakfast Bunting
I’ve always wanted to make a bunting. They’re festive and decorative. And somehow, they always sneak into really lovely craft photos as a background prop. So when my one of my online swap groups suggested a bunting trade, I jumped at the chance! Being non-traditional, I decided on a yummy breakfast theme. Here were the results:

Now if you’re wacky enough to follow me down the bacon paved road, here are the recipes I used to cook up this delicious buffet:
Egg & Toast
Both these patterns may be found in Twinkie Chan’s book, Crochet Goodies for Fashion Foodies . If you don’t already have this book, I highly recommend it. Its silliness is guaranteed to make you smile.
Pancake
This a free pattern courtesy of NyanPon’s Blog and more specifically, Pancake Pattern. The syrup is pure genius. There’s an alternate egg pattern here also for those of you who haven’t met Twinkie.
Pop Tart
I used Rose Langlitz’s book Tasty Crochet as inspiration for this childhood favorite.
Croissant
The croissant pattern is currently available as a free download on Ravelry.com at this location Croissant Pattern. Impress your friends with it’s perplexingly unidentifiable construction. Until the last moment when you roll it up, the piece looks vaguely “gnomey”.
Bacon
Okay, I made this one up. It’s basically a long string of several single crochet rows made whatever length you want. There’s one thin row of beige slip stitch just for variety’s sake. Grab all your rusty red yarns and go nuts!
Wedding Cake Topper
So far, my 30 projects in 30 days challenge is going well! I’m *mostly*on track. More about that later! In the meantime, I thought I’d share the wedding cake topper I made for my friends’ wedding in October. They had a country themed reception and asked me to create them in yarn as cowboy and Native American dolls sitting on a hitchin’ post. Congratulations on your nuptials, Candy and Ricky!
Happy Halloween!!!
Are you scared yet? It’s Halloween – the night of walking ghosts, misty chills, cackling pumpkins and blood-sucking bats. I hope you have a safe and spooktacular celebration!

Halloween Ghouls
For some terrifying delights, check out this patterns:
Crochet Candy Corn Creatures , Mochimochiland Tiny Fall Knits and Happy Crochet Pumpkin.
Knitters’ Cootie Catchers
Continuing with swag items for my group’s knitiversary, I also made knitters’ cootie catchers. Some people call these Chinese fortune tellers. Either way, they’re a fun childhood toy and I have many fond memories of foretelling the identity of my future husband and various other events. Let’s just say the results are still pending on the predictions.

To download your very own knitter’s fortune teller, click fortune teller for a PDF.

