Corn Dog Pens
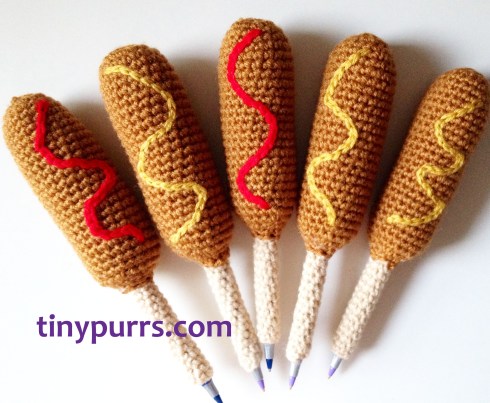
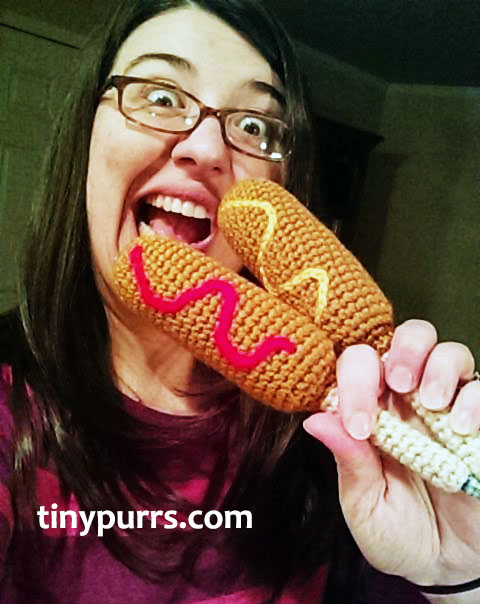
Kid President says mailing corn dogs to people is awesome. Actual corn dogs seemed a bit messy to me, so I whipped up these corn dogs pens to send instead.
- Worsted Weight yarn in beige and brown (I use Vanna’s Choice Beige and Honey)
- Small amount of yellow or red yarn for mustard or ketchup (optional)
- 3.5 mm / E crochet hook
- Polyfill for Stuffing
- Pen (I recommend Bic Round Stic pens)
- Tapestry Needle for sewing
- Scissors
For the corn dog stick, using beige yarn:
- Chain 6, join to form a ring.
- Working in spirals (not joining every round), sc around for length of pen, approximately 22 rows or 4 3/4 inches.
- Finish off, leaving a tail for sewing. Sew the top of the stick closed and weave in ends.
For the corn dog, using brown yarn:
- Start with a magic ring.
- 6 sc in magic ring. (6 sts)
- 2sc in each st around. (12 sts)
-
1 sc, 2sc in next st, repeat around. (18 sts)
-
sc around (18 sts)
-
5 sc, 2sc in next st, around (21 sts)
-
sc for 20 rounds
-
Next, if you want to add mustard or ketchup, surface crochet a wavy line of either color or both, on to your corn dog. Then, start stuffing your corn dog with polyfill. You want it to be well stuffed but still leave some open room towards the bottom center where you can insert a pen.
-
sc 5, dec, repeat around (18 sts)
-
sc 1, dec, repeat around (12 sts)
-
Stuff corn dog with more Polyfill as needed.
-
Dec, repeat around (6 sts)
-
Finish off, leaving a 8 inch tail for sewing. Put your stick cozy on your pen. Then insert the stick into the bottom of the corn dog. Sew corn dog into position and weave in end.
Now that you’ve made some corn dogs, send ’em to your friends as a surprise and watch their hilarious reactions!
Wedding Boutonniere Tutorial
 Hey, folks, it’s me again with another wedding craft for you – boutonnieres and corsages.
Supplies:
- Knit or Crochet Flowers of your choice (I used the Rose Field Baby Blanket by Tanya Sh on Ravelry)
- Wool Felt in green or desired backing color
- Pin Back
- Embroidery thread and sewing needle
- Scissors and an optional circle cutter if you have one
- Pencil, paper and tape
- Glue gun and glue sticks
First, make your flowers. Depending on their size, you might want two or three per boutonniere. Or make more for a corsage. Instead of sewing in my yarn ends, I chose to leave them loose. This is totally optional, depending on the look you want.
Next, arrange your flowers together so you have an idea of how you want them placed.
On paper, trace around the bottom or draw a base for each flower. Cut out these base templates. If you want leaves, cut leaf templates out of paper also. Tape them together in the configuration you want.
 Use your paper template to cut a final felt version. I also cut out an additional leaf to cover up the back side of my embroidery.
Using embroidery thread, sew the pin back on to the BACK of the felt. If you are using leaves, you can optionally embroider veins on the FRONT of the felt.
Hot glue the flowers onto the FRONT of the felt. I glued the flowers individually, allowing the glue to cool between placing each one.
 These are super easy to make and could be used for any occasion, such as Easter or graduations. If you want a matching wedding bouquet, check out my tutorial here.
Wedding Bouquet Tutorial
Supplies Needed:
- Crochet or Knit Flowers from pattern(s) of your choice, approximately 30 but possibly more or less depending on size
- Worsted Weight Yarn for stem/handle cover and 3.5 mm crochet hook
- Foam Floral Ball, approx. 6 inch diameter
- Foam Floral Vase Insert, approx. 2 x 2 inches, by 7 inches long
- 1/4 inch Wood Dowel, cut to 6 inches, sharpened with a pencil sharpener on both ends
- Plastic craft knife for cutting foam vase insert (I used a lettuce knife.)
- Floral pins
- Glue gun and glue sticks
- Sharpie Marker
- Something pointy to make a hole in foam for the dowel. (I used a 4mm metal knitting needle.)
- Ribbon (I used 1 1/2 inch grosgrain), fabric or lace for added decoration (optional)
Safety First! This project offers a lot of opportunities to burn oneself with a glue gun. Please, please be careful! Even better, wear some heat-proof gloves while gluing.
First, make your flowers. In fact, make lots of ’em. Use whatever pattern you like.
My friend wanted spiral flowers so I chose the motif from the Rose Field Baby Blanket by Tanya Sh on Ravelry. I particularly like these flowers because they have a base (that you would normally sew together to form a blanket) which makes them easy to glue on to a foam ball.
Once you’ve created all your flowers and sewn in the ends, you’re ready to move on to making the foam base.
- Personally, I thought a 7 inch stem was too long, so I started by cutting off about 3 inches off the top (or widest end) of the foam vase insert, using my plastic lettuce knife, making a 4 inch stem/handle.
- Using a knitting needle or other pointy object, stab a hole 4 inches deep into the bottom of the foam ball and a hole about 2 inches deep in the top center of the vase insert.
- Stick some hot glue in the vase insert hole and stick the dowel in about 2 inches. Allow to cool.
- Stick some hot glue in the foam ball hole and stick the dowel in about 4 inches. Allow to cool. Don’t worry if there is a small gap between the two pieces. I had about a 1/4 inch gap and filled this in with hot glue.
Once you have a completed foam base, you’ll want to cover the stem/handle. I used a crochet cover, but you could also use wrapped ribbon, lace, burlap or other fabric, or anything you like.
Here’s how I crocheted the cover, but you may have to adjust by adding or subtracting rows from the main body to fit your handle.
Crochet stem / handle cover pattern:
Until the last row, this pattern is worked in a spiral instead of joined rounds. With worsted weight yarn and 3.5 mm hook, make a magic circle.
row 1: 6 sc in magic circle (6 sts)
row 2: 2 sc in each st around (12 sts)
row 3: Through back loops only, repeat *sc 3, then 2 sc in next st* around (15 sts)
row 4: repeat *sc 4, then 2 sc in next st* around (18 sts)
row 5: sc around
row 6: repeat *sc 5, then 2 sc in next st* around (21 sts)
row 7: sc around
row 8: sc around
row 9: 2 sc in next st, sc around (22 sts)
row 10: sc around
row 11: sc 10, 2 sc in next st, sc 11 (23 sts)
row 12: sc around
row 13: 2 sc in next st, sc around (24 sts)
row 14: sc around
row 15: sc 10, 2 sc in next st, sc 13 (25 sts)
row 16: sc around
row 17: 2 sc in next st, sc around (26 sts)
row 18: sc around
row 19: sc 15, 2 sc in next st, sc 10 (27 sts)
row 20: sc around
row 21: 2 sc in next st, sc around (28 sts)
row 22: sc around
row 23: sc 17, 2 sc in next st, sc 10 (29 sts)
row 24: sc around
row 25: 2 sc in next st, sc around (30 sts)
row 26: sc around
This is where you decide if your crochet piece fits your handle. You can either continue alternating increasing by 1 on a row and then sc only on the next row, to lengthen the piece. Or you can rip back if it’s too long.
Now for part that attaches to the base of the foam ball….
row 27: sl st to join, ch 2, DC in the same st as join, repeat *DC, 2 DC in next st* around. Sl st to join.
Finish off. Weave in ends.
Attach the crochet cover to the handle with glue. As you can see, I started at the bottom with the cover folded down and progressively added a little glue while rolling up the cover up towards the flower sphere. Hot glue leaks through crochet stitches pretty easily, so please be careful not to burn yourself.

 Next, I used floral pins to arrange my flowers on the foam ball, making sure I got the color arrangement I wanted.
Then, I unpinned each flower and hot glued it into place.
Finally, I added a ribbon, tied around the handle. I used a couple of floral pins to attach the bow to the handle at the back, so if the ribbon came untied, it would not be lost from the bouquet.
Tah-dah! There you have it, folks, a custom wedding bouquet that, unlike fresh flowers, can be a souvenir of the special day for years to come.
Congratulations to my newlywed friends, Amy and Peter!!!!! May your life together fulfill all your dreams!!
It lives!!!!
I know what you’re thinking: that I abandoned this blog or was abducted by aliens or won the lottery! Nope! Cliche, I know, but life just got busy for a bit. A long bit, actually. Some moments in the past year were heartbreaking. I will always miss my late friend, David. Other moments were happy, such as seeing my BFF get married. Plus, there was a lot general mucking about and adventures with Mr. Tinypurrs. We rescued kittens, saw the Dalai Lama, traveled and perfected our liquour making skills, amongst other things. But the good news is I have loads of projects to share with you! Maybe I can finally sit down and start writing about them all! I’ll dust off my keyboard and give it a go.
Happy purrs,
Kristen
Magic Yarn Balls
Today I’m making magic yarn balls. Magic yarn balls are skeins of yarn with little gifts wrapped inside. As you knit the yarn, treasures reveal themselves within. They make wonderful gifts for knitters and crocheters but you don’t have to be a fiber artist to make one! Here’s some examples of what they look like:
Yarn balls can be made from either one color yarn or comprised of mini skeins of various colors. If you haven’t joined the mini skein revolution, I highly recommend you check out the Beekeeper’s Quilt or tinyowlknits charms. Warning: these patterns are extremely addictive!
If you’re making magic yarn balls for hexipuffs, you’ll want to measure out mini skeins in increments of 15 yards per puff for fingering weight yarn. This can quickly be done by weight of the yarn or measuring length. Personally, I don’t own a fiber or kitchen scale, so I grabbed a cereal box with which to measure. If you have a yarn bowl or similar substitute, grab that too! My box is 33 inches around (so a little short of 36 inches needed for yard) so (rounding up) I wrapped my yarn around it 17 times to make a slightly longer than 15 yards hexipuff mini skein. Next I decided to make my skeins double length for two hexipuffs of each color, so I kept wrapping until I reached 34 wraps per skein. Then using the instructions in this youtube video, I twisted the yarn into a mini hank for safe keeping.
After I measured out all my mini skeins, I collected some treats to include in my magic ball. Treats can be all shapes and sizes. Consider including tea bags, candy, notions, small amigurumi, magnets, keychains, fat quarters of fabric, knitting needles, crochet hooks, washi tape, etc. I intentionally did not choose potentially melting treats that aren’t completely sealed such as foil wrapped chocolates or unpackaged lip balms because they could melt inside the ball and ruin the yarn. (I live in Texas so shipped items are often exposed to extreme heat.) I wrapped some of the treats in gift paper so they remain mysterious until my giftee finds them in the yarn. Some treats I left unwrapped and poking outside the ball to tease my giftee with what’s to come.
Here are some examples of prizes I selected.
Also, did you know that a mini M&Ms candy container makes a wonderful nostepinne? I don’t know who discovered this idea but it’s brilliant. They’re great for the core of a magic yarn ball and also for making mini hanks into balls later. Check out this youtube video.

Next, consider labeling the yarns you’re using to create your ball. If you’re using a lot of different colors and brands, you may want to tie tags into the ball saying what each type of yarn is. This is a nice touch especially if your giftee falls in love with a yarn and wants to shop for more of it later. Or you could create a separate color key using a index card and a hole punch. Tie yarn samples onto the card and label the types of yarn.
Now you’re ready to make a yarn ball! I chose a treat and started wrapping the yarn around it. I tried to wrap the yarn gently, not tightly, so I wouldn’t stretch it out. As I wrapped, I added more treats wherever they seemed to fit. You’ll be surprised how many gifts you can hide in one yarn ball. Of course, the more yardage you include, the more gifts you can hide. I think I fit about 20 small gifts in 300 yards of fingering weight yarn and could have easily included more.
Once you’re done wrapping, consider decorating the outside of your magic yarn ball. Adding flowers, ribbons, buttons, bows, decorative clips, furoshiki wrap, crochet Ditty Bag , etc. will create a finishing touch and also help hold your ball together. Holding everything together is especially important if you’re shipping. Speaking of shipping, do you know what makes an awesome packing material? Polyfill! Your crafty giftee can use it for hexipuffs or other projects.
Tah-Dah! Now you’ve finished your magic yarn ball, you have a wonderful gift for the fiber geek in your life!
I’d like to thank my ravelry.com friends, Hoffmala and DollyFaceKnits, for their inspiration in making magic yarn balls. Hoffmala created the wonderful pink yarn ball pictured in the examples.
Got some other ideas on how to make magic yarn balls? Please add your ideas in the comments!
Ravellenic Games Finish Line
This was my first year to participate in the Ravellenic Games on ravelry.com. If you aren’t a raveler, these games are like NANOWRIMO and the Olympics combined. The goal is to challenge oneself and complete projects within the same time limit as the Olympics. I had some successes and some failures. I didn’t complete my most ambitious knit for the games, a BFF Cowl. I did however finish a couple of smaller projects including an adorable bunny from The Green Dragonfly and some sweet Travel Owls by Morning Cup of Jo. I was really surprised and honored to find my Rav Games bunny was featured on the Ravelry home page on February 24!
New Baby Yub Nub Free Crochet Pattern!
It’s finally here! My new Baby Yub Nub free crochet pattern is available for download on Ravelry.com!!!
Cookie Needle Book
Inspired by a notions swap, I baked up a cute little chocolate chip cookie needle book! You could easily change the pattern to suit whatever flavor cookies you like: chocolate sandwich cookies, sugar cookies, etc.
Supplies:
Worsted Weight Yarn, Small amounts of Tan and Brown
3.5 / E crochet hook
Felt
Glue
Sewing machine or hand sewing supplies
Pattern note: 2scinc means do 2 sc in the same stitch to increase by 1
Cookies (make 2):
Working in a spiral without joining, starting with tan:
Magic Loop
6 sc in loop (6 sc)
2scinc around (12 sc)
[sc, 2scinc] repeat around (18 sc)
[sc, sc, 2scinc] repeat around (24 sc)
[sc, sc, sc, 2scinc] repeat around (30 sc)
[sc, sc, sc, sc, 2scinc] repeat around (36 sc)
Finish Off. Sew in ends.
Embroider chocolate chips using brown yarn.
Filling:
Using template, cut two pieces of felt.
Hand or machine sew two felts together along the center line.
Glue or sew outside felt pages to wrong side of cookie pieces.
Voila! Now you have a cookie needle book!


