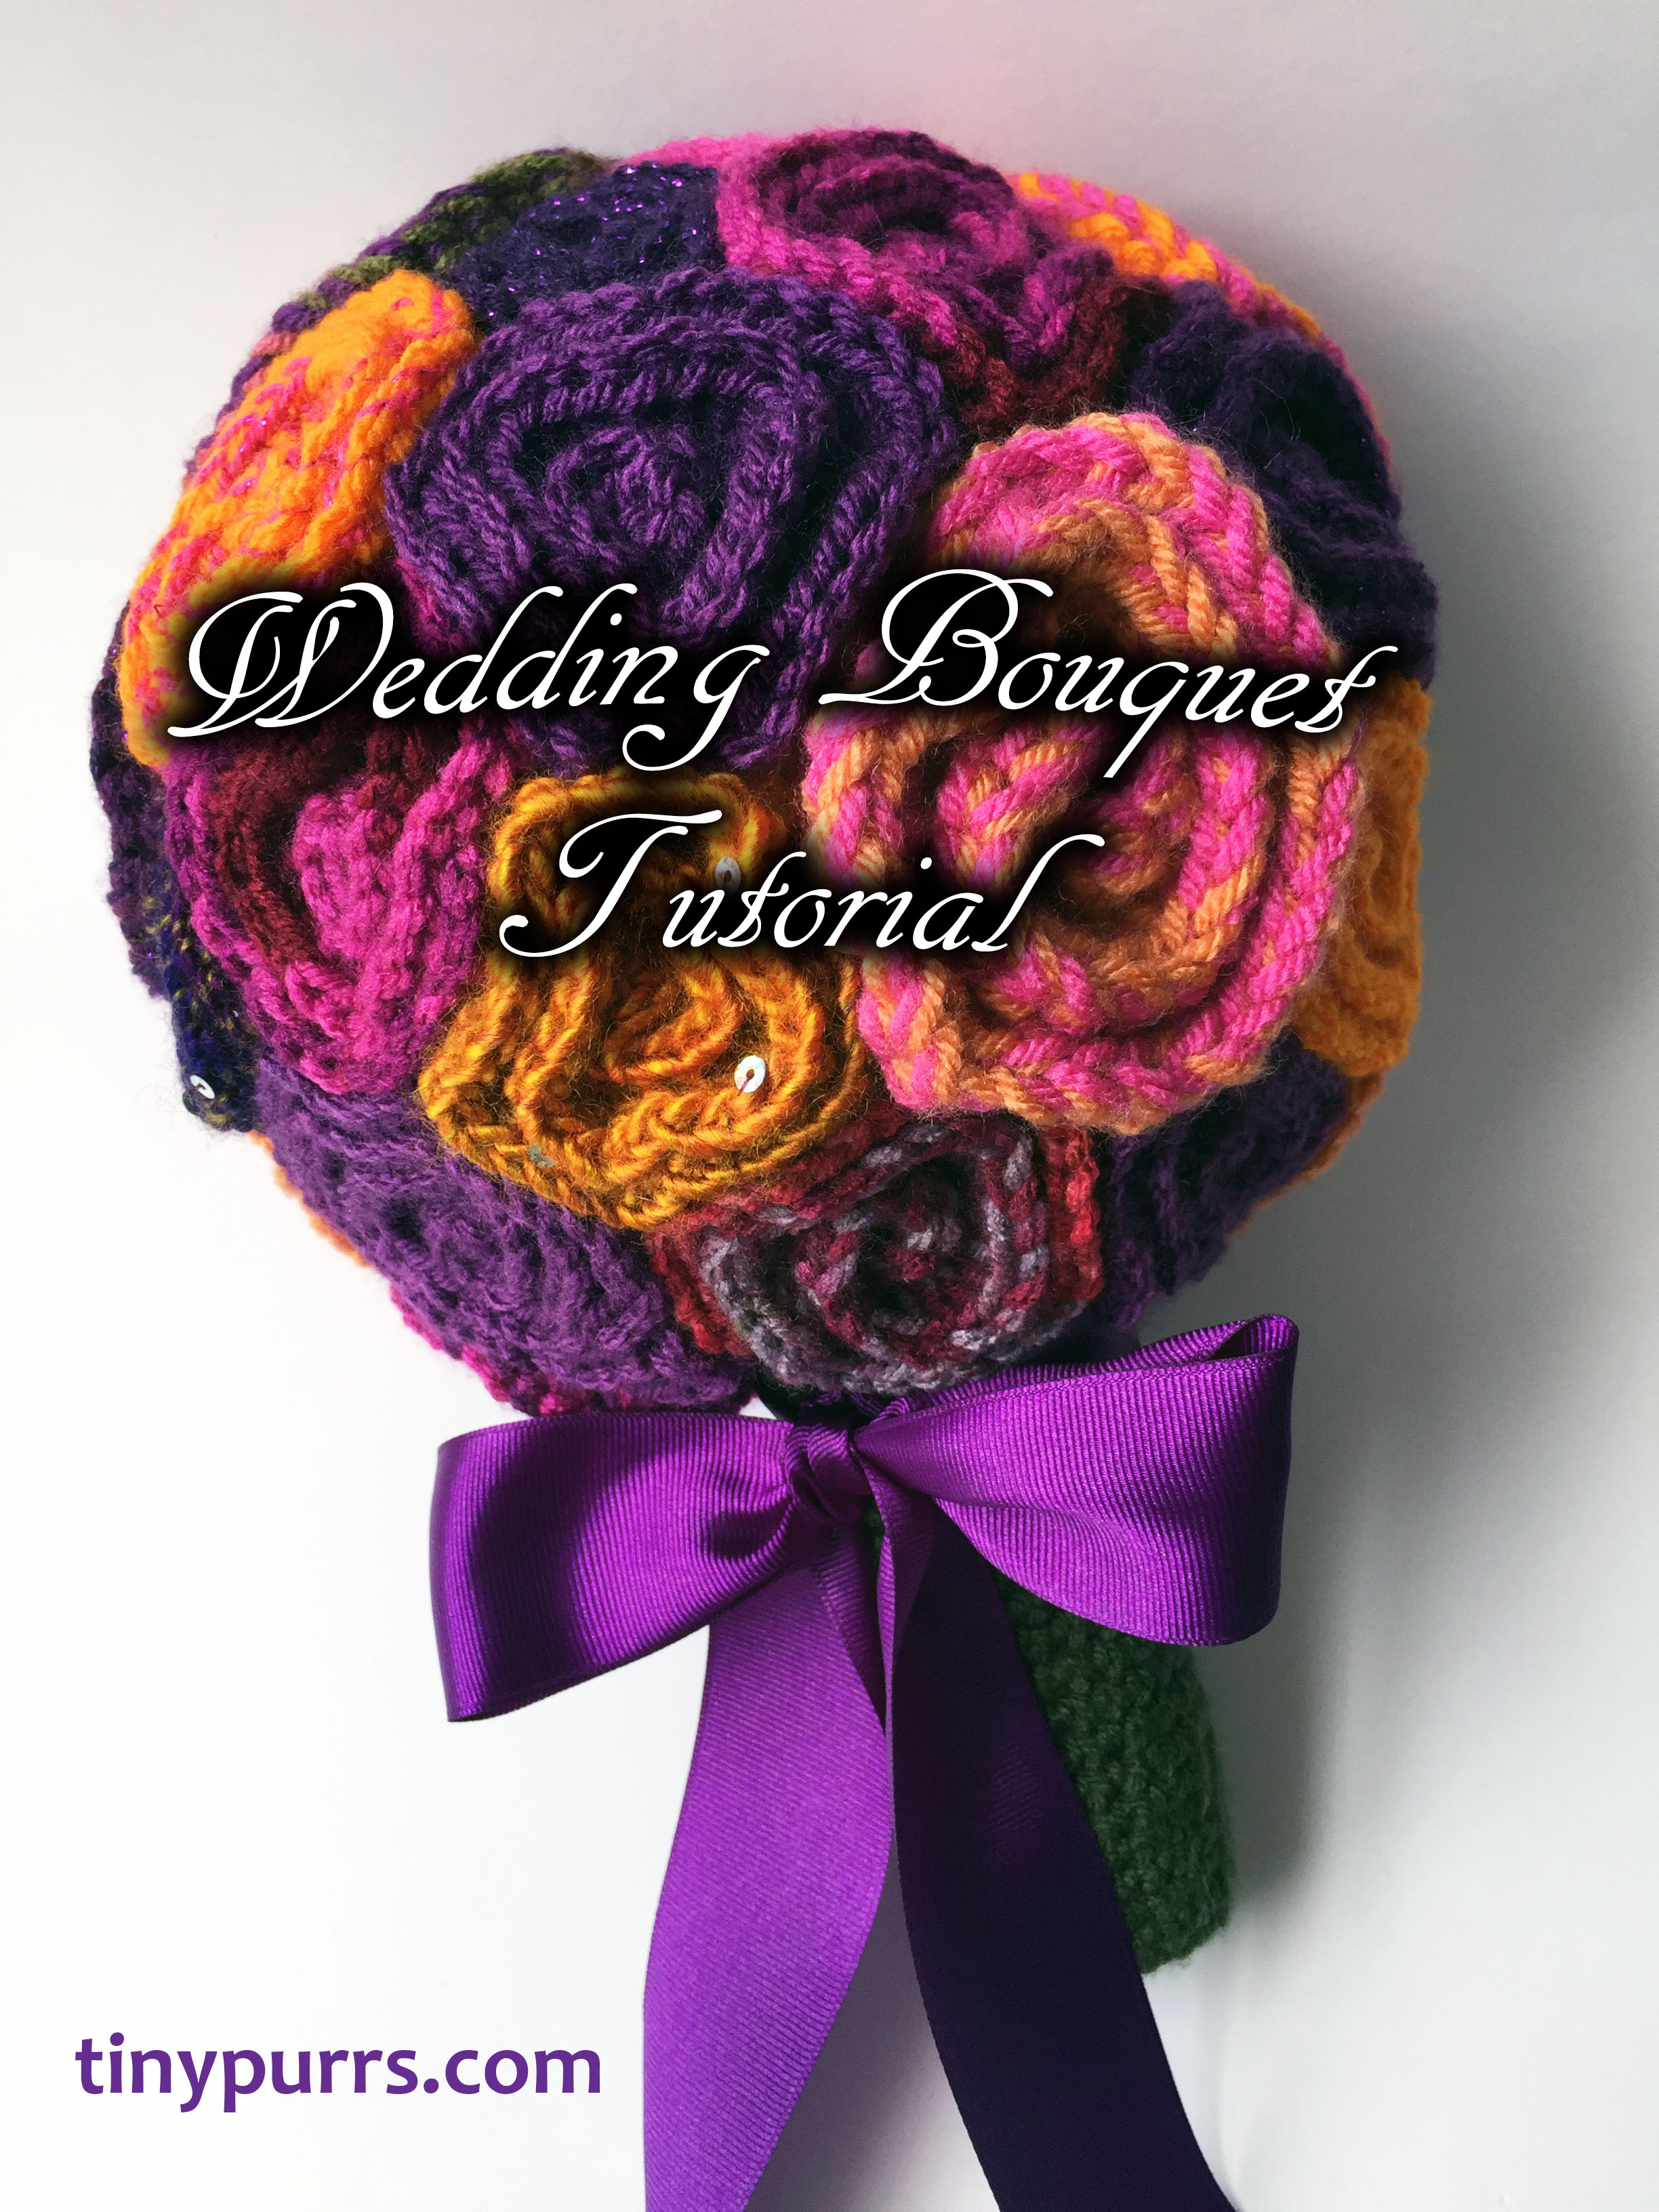
Wedding Bouquet Tutorial
Supplies Needed:
- Crochet or Knit Flowers from pattern(s) of your choice, approximately 30 but possibly more or less depending on size
- Worsted Weight Yarn for stem/handle cover and 3.5 mm crochet hook
- Foam Floral Ball, approx. 6 inch diameter
- Foam Floral Vase Insert, approx. 2 x 2 inches, by 7 inches long
- 1/4 inch Wood Dowel, cut to 6 inches, sharpened with a pencil sharpener on both ends
- Plastic craft knife for cutting foam vase insert (I used a lettuce knife.)
- Floral pins
- Glue gun and glue sticks
- Sharpie Marker
- Something pointy to make a hole in foam for the dowel. (I used a 4mm metal knitting needle.)
- Ribbon (I used 1 1/2 inch grosgrain), fabric or lace for added decoration (optional)
Safety First! This project offers a lot of opportunities to burn oneself with a glue gun. Please, please be careful! Even better, wear some heat-proof gloves while gluing.
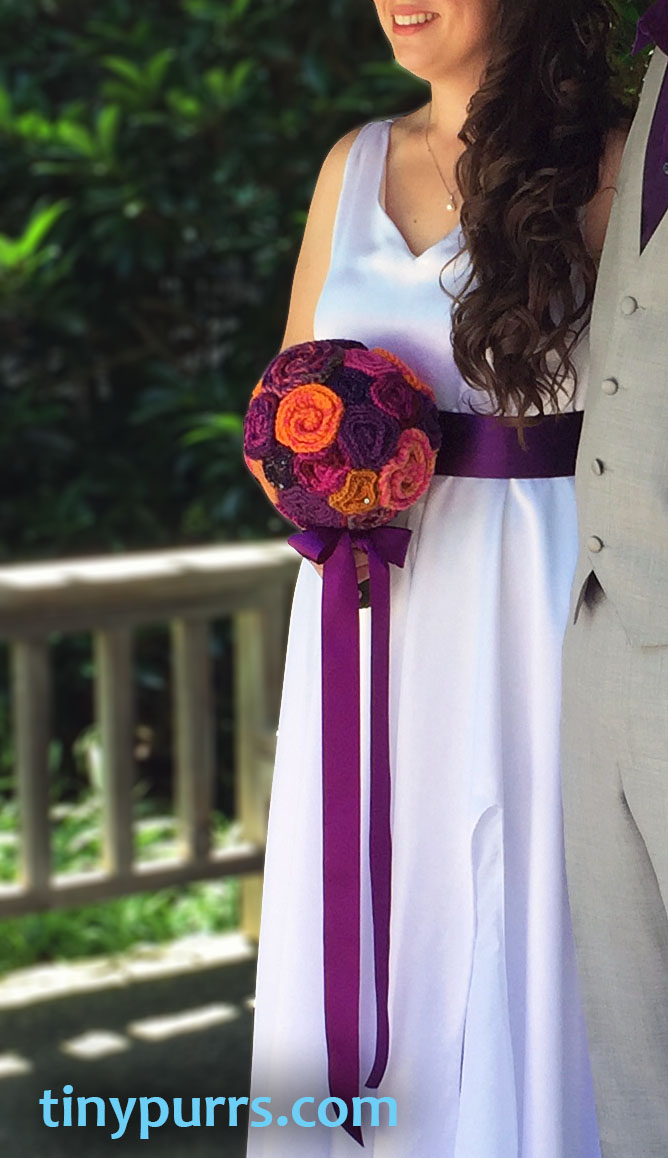
First, make your flowers. In fact, make lots of ’em. Use whatever pattern you like.
My friend wanted spiral flowers so I chose the motif from the Rose Field Baby Blanket by Tanya Sh on Ravelry. I particularly like these flowers because they have a base (that you would normally sew together to form a blanket) which makes them easy to glue on to a foam ball.
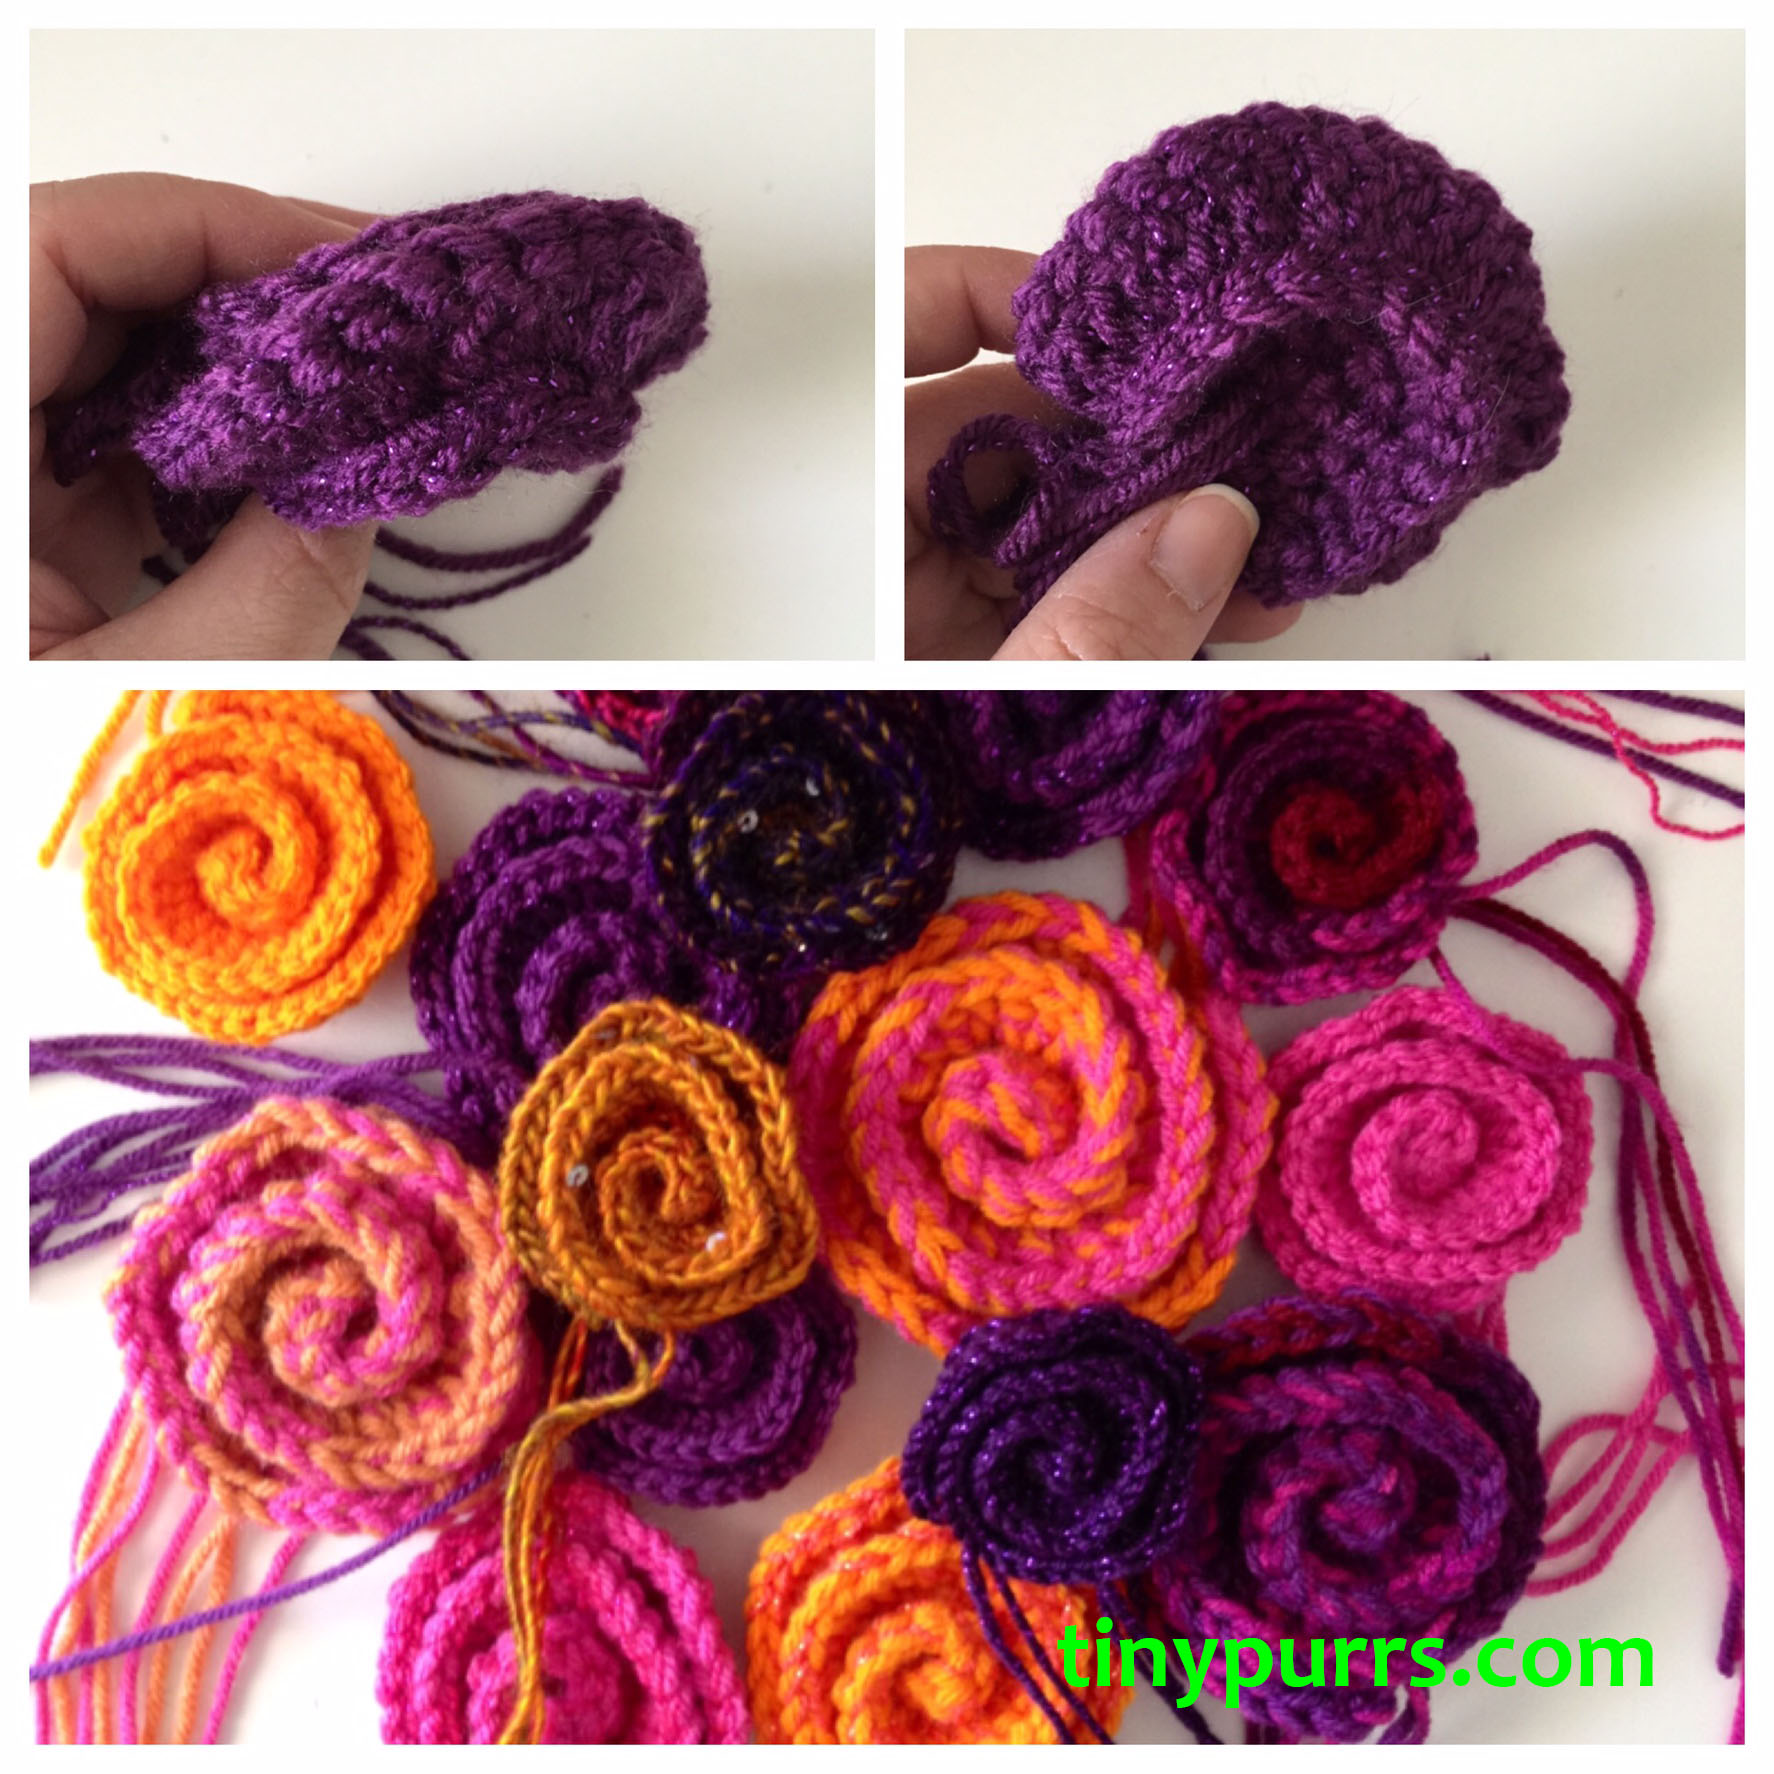
Once you’ve created all your flowers and sewn in the ends, you’re ready to move on to making the foam base.
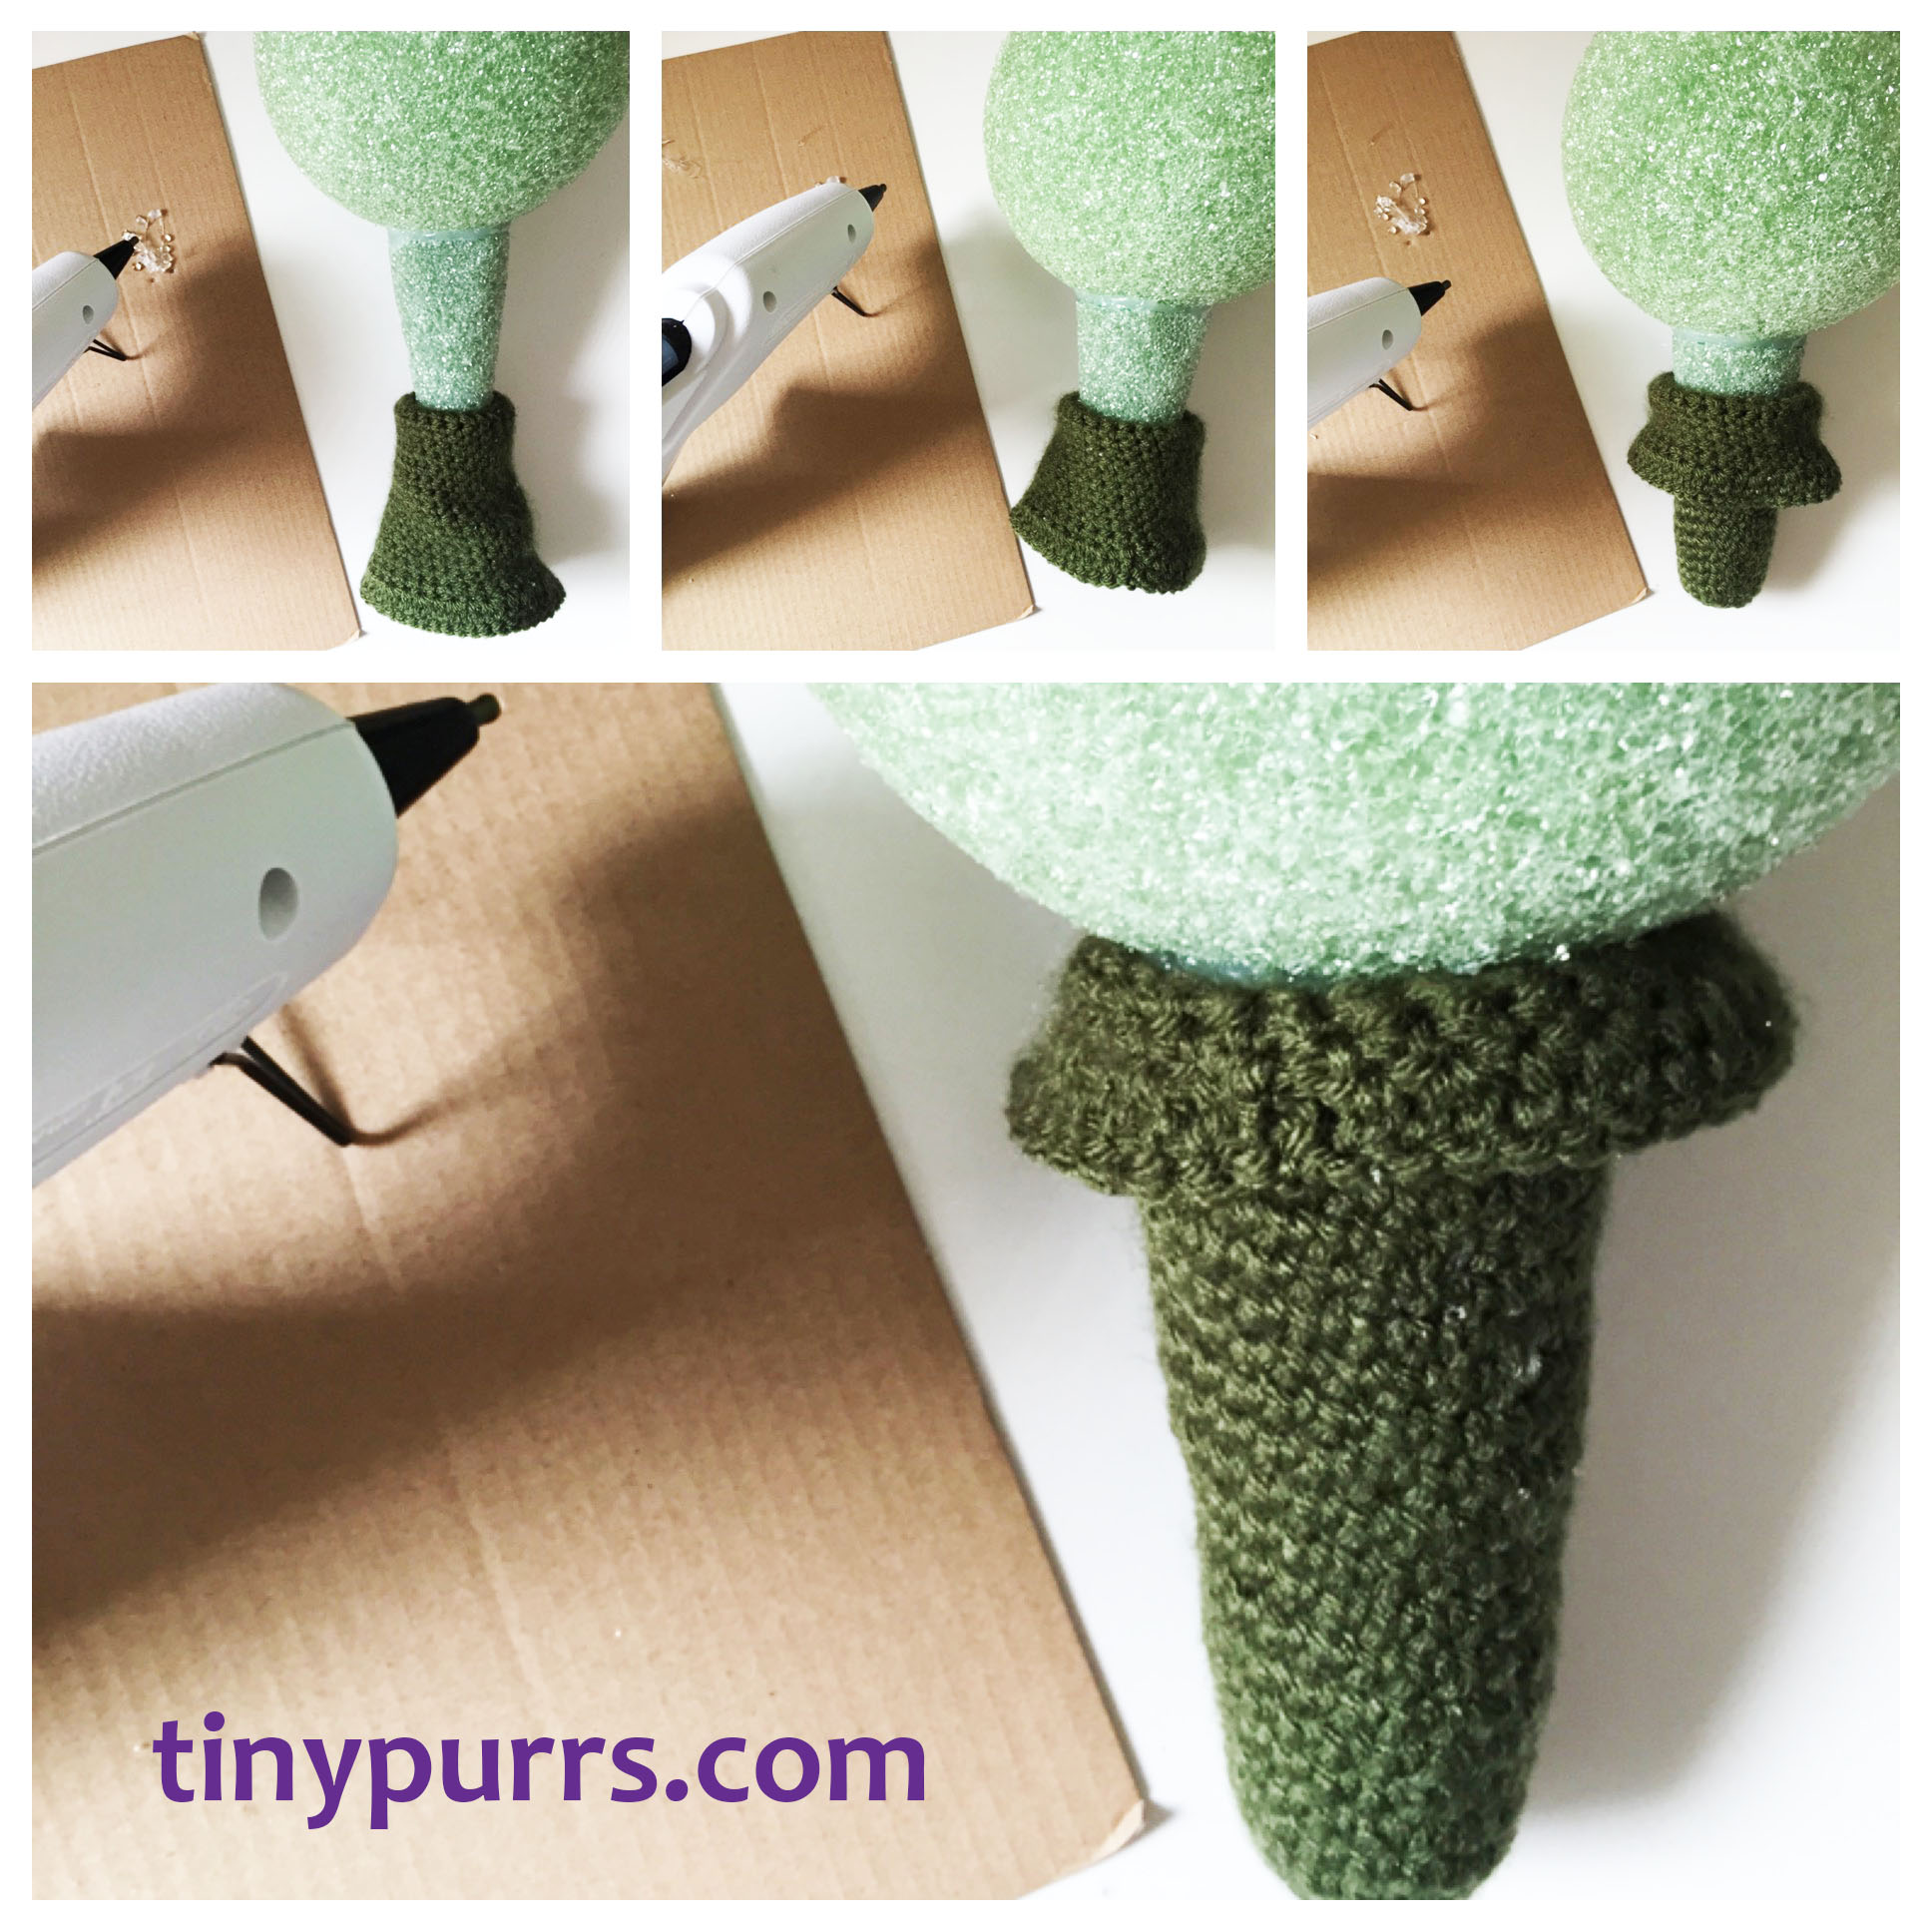
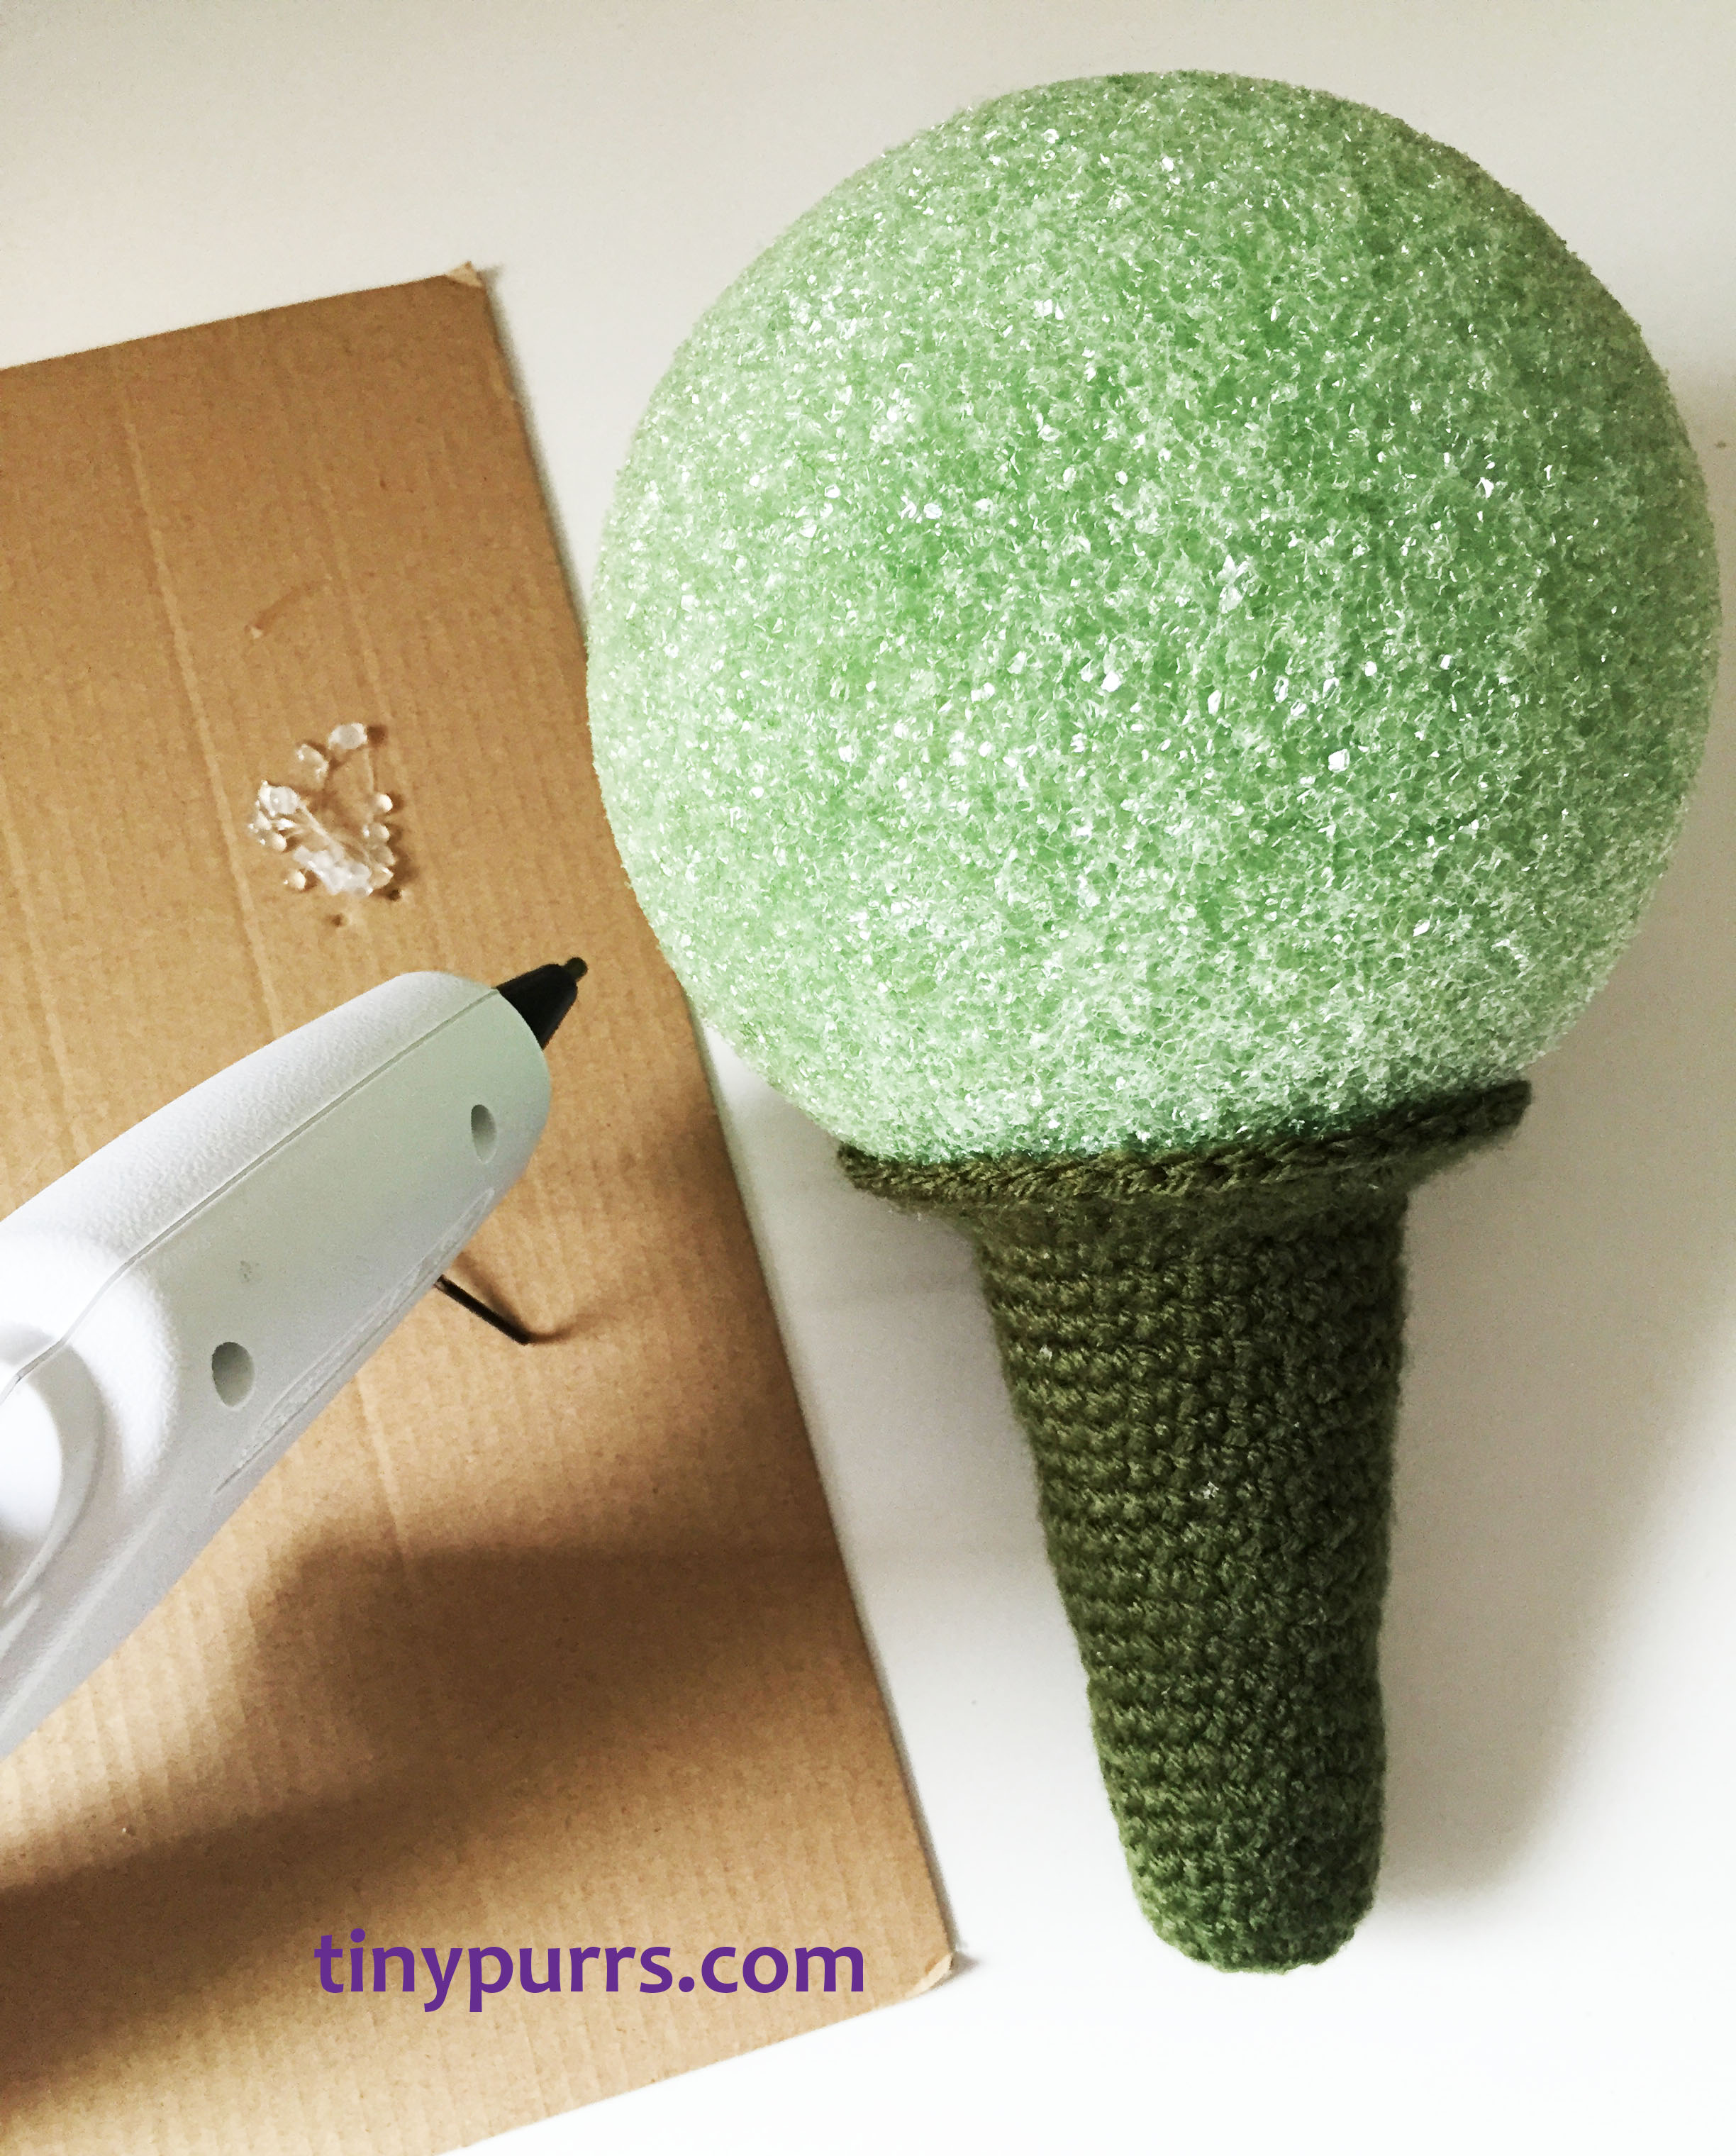
- Personally, I thought a 7 inch stem was too long, so I started by cutting off about 3 inches off the top (or widest end) of the foam vase insert, using my plastic lettuce knife, making a 4 inch stem/handle.
- Using a knitting needle or other pointy object, stab a hole 4 inches deep into the bottom of the foam ball and a hole about 2 inches deep in the top center of the vase insert.
- Stick some hot glue in the vase insert hole and stick the dowel in about 2 inches. Allow to cool.
- Stick some hot glue in the foam ball hole and stick the dowel in about 4 inches. Allow to cool. Don’t worry if there is a small gap between the two pieces. I had about a 1/4 inch gap and filled this in with hot glue.


Once you have a completed foam base, you’ll want to cover the stem/handle. I used a crochet cover, but you could also use wrapped ribbon, lace, burlap or other fabric, or anything you like.
Here’s how I crocheted the cover, but you may have to adjust by adding or subtracting rows from the main body to fit your handle.
Crochet stem / handle cover pattern:
Until the last row, this pattern is worked in a spiral instead of joined rounds. With worsted weight yarn and 3.5 mm hook, make a magic circle.
row 1: 6 sc in magic circle (6 sts)
row 2: 2 sc in each st around (12 sts)
row 3: Through back loops only, repeat *sc 3, then 2 sc in next st* around (15 sts)
row 4: repeat *sc 4, then 2 sc in next st* around (18 sts)
row 5: sc around
row 6: repeat *sc 5, then 2 sc in next st* around (21 sts)
row 7: sc around
row 8: sc around
row 9: 2 sc in next st, sc around (22 sts)
row 10: sc around
row 11: sc 10, 2 sc in next st, sc 11 (23 sts)
row 12: sc around
row 13: 2 sc in next st, sc around (24 sts)
row 14: sc around
row 15: sc 10, 2 sc in next st, sc 13 (25 sts)
row 16: sc around
row 17: 2 sc in next st, sc around (26 sts)
row 18: sc around
row 19: sc 15, 2 sc in next st, sc 10 (27 sts)
row 20: sc around
row 21: 2 sc in next st, sc around (28 sts)
row 22: sc around
row 23: sc 17, 2 sc in next st, sc 10 (29 sts)
row 24: sc around
row 25: 2 sc in next st, sc around (30 sts)
row 26: sc around
This is where you decide if your crochet piece fits your handle. You can either continue alternating increasing by 1 on a row and then sc only on the next row, to lengthen the piece. Or you can rip back if it’s too long.
Now for part that attaches to the base of the foam ball….
row 27: sl st to join, ch 2, DC in the same st as join, repeat *DC, 2 DC in next st* around. Sl st to join.
Finish off. Weave in ends.
Attach the crochet cover to the handle with glue. As you can see, I started at the bottom with the cover folded down and progressively added a little glue while rolling up the cover up towards the flower sphere. Hot glue leaks through crochet stitches pretty easily, so please be careful not to burn yourself.
 Next, I used floral pins to arrange my flowers on the foam ball, making sure I got the color arrangement I wanted.
Then, I unpinned each flower and hot glued it into place.

Finally, I added a ribbon, tied around the handle. I used a couple of floral pins to attach the bow to the handle at the back, so if the ribbon came untied, it would not be lost from the bouquet.
Tah-dah! There you have it, folks, a custom wedding bouquet that, unlike fresh flowers, can be a souvenir of the special day for years to come.
Congratulations to my newlywed friends, Amy and Peter!!!!! May your life together fulfill all your dreams!!

